Why?

This blog is to help you in preparing for an emergency. It also contains other information that you might find spiritually up-lifting. This is not an official website of "The Church of Jesus Christ of Latter-day Saints". This site is maintained by Barry McCann (barry@mail.com)

Saturday, August 17, 2013

Story on LDS.ORG About New York, New York South Missionaries - AUGUST 14th 2013

SALT LAKE CITY — Since the October 2012 announcement that men can begin Mormon missionary service at age 18 and women at 19, the ranks of Mormon missionaries have swelled. Prior to the announcement, 58,500 missionaries were serving; as of this week, that number is now 75,000.

The following story and videos about the lives of Mormon missionaries provide insights into what these missionaries do and why they do it.

Life of a Mormon Missionary: Teaching Others About Christ


After the rains of Hurricane Sandy stopped in late October 2012, Elder Jordan Walton, a missionary in the New York New York South Mission of The Church of Jesus Christ of Latter-day Saints, recalls driving with his companion, Elder Josh Munday, to affected areas such as Broadchannel and Rockaway to see the incredible devastation.

“I remember as [we] walked down those streets, [we saw] the look on these people’s faces and they did not know what to do,” Elder Walton says. “We started helping them. We started taking out their floorboards, we started taking out their sheetrock, their dirty couches — all the things that they couldn’t use.”

Over the next six weeks, the New York New York South Mission helped orchestrate over 120,000 hours of service from more than 11,000 volunteers. Although not all Mormon missionaries around the world participate in such extensive community service, the story is a reflection of the core purpose shared by each of the Church’s 75,000 missionaries in 405 missions: to invite others to come unto Christ through word and deed.
Following the pattern Jesus Christ established in the New Testament, full-time Mormon missionaries are sent out two by two (see Mark 6:7) to teach the gospel through lessons and service for 18 to 24 months. Men can serve at 18, women at 19; each funds his or her missionary service (an approximate cost of $10,000 to $12,000), sometimes with the help of family and friends. As Christ taught, these missionaries find greater purpose in their lives as they focus on the needs of others — a process that New York New York South Mission president Kevin Calderwood says “dramatically changes their hearts.”
A Typical Day
Missionaries are up by 6:30 every morning. They spend all day, every day with an assigned companion (companion changes occur every couple of months). Each companionship spends several hours every morning studying the teachings of Jesus Christ and discussing that day’s planned teaching appointments. “We’re really thinking about each of the people we’re going to see that day and how we can help them come closer to the Savior,” Elder Walton says.
The morning routine also includes language practice for those missionaries assigned to speak a second language. In the New York New York South Mission, Sister Kimberly Bradfield and her companion, Sister Shianne Allen, teach others in Spanish. Like many missionaries learning a foreign language, they didn’t know Spanish before their mission, creating a kind of baptism by fire in language learning.
“Neither of us knew Spanish prior to our mission, and so for nine weeks we studied Spanish [at a missionary training center],” Sister Bradfield says.
After the morning routine, missionaries meet with individuals in a wide variety of settings until 9 p.m., with a short break in between for lunch and dinner. Depending on location, they can travel by foot, bike, car, bus or other means. They talk with people on the street and in their homes, discussing basic Mormon beliefs and answering questions. And because many people prefer to connect online, missionaries also use the Internet and digital devices in their ministry.
Missionaries visit those of other faiths and Church members in need of an uplifting message. Sister Bradfield says missionaries don’t force their beliefs on others; rather, “[We] invite them to come unto Christ — not to change the faith they have, but to strengthen that faith.” Elder Munday adds, “[We’re] here to strengthen and give a little bit of hope to people. Our ultimate message to the world is that through the Savior Jesus Christ you can overcome trials.”
Missionaries provide community service such as disaster cleanup (like the aforementioned Hurricane Sandy effort), teaching English and visiting the elderly. “We help anybody and everybody,” Sister Allen says. After Hurricane Sandy, Mormon missionaries made an effort to not only help fellow Mormons but also, Sister Allen says, “to help their neighbors and to help anybody within their area.” The collective number of yearly service hours given by these 75,000 young men and women is in the millions.
Missionaries also take a few hours one day a week for personal tasks, such as laundry, cleaning, grocery shopping and writing to family via email.


Finding Themselves by Serving Others
Elder Munday says the beginning of his mission was perhaps the most difficult time of his life. He found himself far away from his home in England, struggling with homesickness. The turning point came when he began to look outside himself. “That’s when I was able to feel comfortable here, when I stopped caring about myself and start caring about others,” he says. “It helped me to grow so much.”
Focusing more on others is not easy for anybody, especially teenagers and young adults. “That’s usually a period of our lives when we’re quite self-absorbed,” President Calderwood says. “These missionaries give up all of that.”
This results in missionaries becoming more concerned about what’s happening to their fellow man than they are about themselves. Such service builds a “good foundation for their lives to become good spouses, good fathers, good mothers and very good in their communities,” President Calderwood says.
“It’s just one of the most rewarding things you can do,” Sister Bradfield says of missionary service. “True happiness is really in helping the people around you.”

missionary number infographic

Friday, August 16, 2013

8 Common Mistakes of Wilderness Survival

1.  No Shelter
emergency preparedness shelterThis is a two fold mistake that will cost you your life in a Wilderness Survival Situation.  The first fold of this mistake is not having a proper shelter with you, the second fold is not having the knowledge to build a shelter from nature’s tools which are all around you.  When talking about someone or a group of people who died in the Wilderness there is a common term that you will hear come up, exposure.  Whether it is hypothermia or heat stroke, the bottom line is you either did not have shelter (tent, tarp, sleeping bag with bivvy) or you didn’t have the knowledge to build a suitable shelter to shield yourself from the elements.  Remember, Staying Dry is the first rule of Survival.
2. Lack of Good Navigation Tools
emergency preparedness map and compassPeople who venture into the Wilderness without a map, compass, and GPS are flirting with disaster. Anyone who has spent time in the woods knows that within seconds even the best woodsman can get turned around in thick trees and bushes and begin to walk the wrong way.  The key to navigation is having a back up method to find your way to safety, remember “Two is One and One is None” never rely on GPS alone.  Having a good understanding of cardinal directions using the Sun and Stars is also beneficial if you are thrown into a situation where prior preparation wasn’t available (plane crash, boat wreck).
3. Poor Knowledge
“Be Prepared” is the motto of the Boy Scouts, unfortunately most people who find themselves in a Wilderness Survival situation have very poor knowledge on how to survival and are usually totally unprepared.
4. Miscalculating the Risk
emergency preparedness riskMost Wilderness Survival situations start off very innocent; like a fishing trip with friends, a day hike on a familiar trail, or a planned father & son hunting trip.  Then things go terribly wrong and suddenly you are faced with a life and death scenario.  The only thing you can do is plan for the unexpected.  Sit down and go through contingencies before you set off on your trip.  Once you leave, it is too late.   There is an old military saying “Failing to Plan is Planning to Fail.”  Make sure you have done this same process with your emergency car kit.
5. The Wrong Clothes
As a rule you should always dress one layer warmer than you need.  You can always take stuff off and wrap it around your waist, stuff into your pockets or put it in your backpack if you get hot.  But once you leave an article of clothing behind there is nothing worse than being cold knowing that you left your jacket in the closet.  Also remember the outdoor sayings about Cotton. (Cotton Kills, Friends don’t let friends wear Cotton, and Cotton is Rotten) Find and wear clothes that retain their warmth even after they become wet.  Also have a shell jacket and pants of some kind for rain and snow.  Remember, most cases of hypothermia happen in temperatures over 40 degrees Fahrenheit.
6. Getting Drinkable Water
emergency preparedness drinking waterWe all know that the human body doesn’t last long without water.  The question you have to ask yourself in a Wilderness Survival situation is “Will this water make me sick?”  Waterborne organisms such as cryptosporidium and giardia can cause severe diarrhea and vomiting that increases dehydration and reduces your ability to carry on your other survival efforts such as building shelter, finding food, and signaling for help.  On the flip side dehydration will kill you in a matter of days.  Without a good supply of pure drinking water, the body can become dehydrated very quickly.  Along with dehydration comes poor judgment, loss of energy, and eventually you will lose the will to survive.  There are several methods for purifying water (Boiling it, Chemical tablets, & Water Filters) and there are several methods for catching rain water or dew.  Learn these strategies and be prepared.
7. No Signal Plan
Being able to signal for help is a key trait in Wilderness Survival.  If you go to almost any outdoor store they will have a whole section dedicated to these devices.  The most common ones are whistles and signal mirrors but you also have to think about being able to use fire starting devices and high beam flashlights.  Other good tools to have are radios, bright clothes, and emergency beacon devices such as ACR or SPOT.  If you are caught in a Wilderness Survival situation without any of these tools, have an understanding for creating an emergency signal using rocks, trees, snow, or dirt.
8. Fire
how to build a fireIt is only one word but in Wilderness Survival it has many meanings.  Warmth: a good fire can keep you and your loved ones warm in some of the worst conditions.  Protection: a strong fire can keep you safe from predators and a long burning stick has scared more than one animal away.  Signal: a blazing fire can be seen for miles away at night and the smoke can be seen during the day.  Purifier: a hot fire can be used to boil water and keep your drinking water safe.  Keep several methods of making a fire with you when traveling in the Wilderness and also learn how to make a fire the old fashion way……with two sticks.

Know the 5 keys to Wilderness Survival 
1. Know how to build a shelter
2. Know how to signal for help
3. Know what to eat & how to find it
4. Know how to build and maintain a fire
5. Know how to find water and prepare safe water to drink.

Wednesday, August 14, 2013

3 Steps to Building a Fire


emergency preparedness survival fire
There is no doubt about the greatest advance since mankind started hunting with spears, clubs and wearing animal skins… is the ability to harness the power of fire.  In a survival situation, being able to get a fire going can mean the difference between life and death.  With a fire you can boil water for drinking or cooking, provide heat, and even signal for help.  The heat and light provided by a fire while alone at night in the middle of nowhere, can provide a sense of security and comfort.  Fire can also serve as a weapon to drive off predatory animals.
It can be extremely difficult to get a fire to ignite and burn.  This can be even more difficult if you are forced to use wet wood while shivering from the howling cold night air and trying to light a match with cold wet stiff fingers.  It  can be life threatening if you are not prepared and do not have the proper necessities and knowledge.  Most people aren’t prepared to start a fire without the use of matches, lighters and traditional “tinder” (like paper).

1. Preparing Your Materials

Fires must have fuel or “tinder” which helps start the fire.  Most people have more tinder than they realize.  Different types of tinder can be found many places.  You can use the lint from your pockets or tear small pieces of clothing and fray them so they burn easier.  Small scraps of paper, Q-tips cotton ends, the fluff from wool clothing are all great options as fire-starters.  Other types of tinder that most people don’t think about are:  alcohol prep pads, Carmex, chap-stick, deodorant stick, hand sanitizer, insect repellent, Neosporin, petroleum jelly and even snack chips.  Any of the items mentioned above can be used as tinder to get the fire started.

2. Building Your Fire Ring

Keeping your fire lit can be a challenge of its own. When trying to start a fire try to have the ring of survival firefollowing items on hand: plenty of small twigs, bark, or any other type of flammable material you can procure.  After gathering fuel for the fire, place the tinder on an area of ground that you have cleared as best you can.  Next, surround the burn area with a nonflammable ring (barrier) made of rocks or an equivalent alternative (cinder blocks, bricks, scrap metal, etc.).  Creating this barrier accomplishes at least three significant advantages in building and maintaining a fire:
First, it keeps the fire contained.
Second, the barrier becomes heated by the fire and retains this heat for a significant duration of time depending on what materials you are using.  This material can then be placed around you to keep warm, heat up water (possibly even boil water which can help provide safer drinking alternatives for hydration), or even heat up and cook food.
Third, it protects the fire from being snuffed out by a gust of wind.  You will find that when you’re struggling to make a fire or keep it lit, it’s a game of margins.  The smallest breeze can derail alot of hard work and deplete your resources quickly.  Keep in mind that you will need to make sure to make the barrier open (wide) enough to let the fire breathe (fire needs oxygen) while keeping any significant breeze out.

3.  Putting It All Together

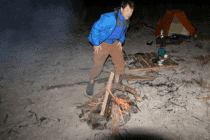
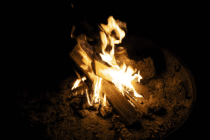
After taking the above steps and procuring all the needed materials, place the tinder in the center emergency fire startersof the ring and place the twigs and small amounts of fuel on the tinder.  Do not bury the tinder.  Leave the fuel laying loose or placed in a sort of tee-pee above the tinder. Next,  ignite the tinder with yourfire starter (matches, a fire starter, flint or a lighter_.  Place more fuel on the fire as it grows.  A fire will consume large amounts of fuel very quickly.  Make sure you have plenty stacked up nearby so you are not trying to find more in the darkness or if your fire is about to go out.
If all you have is damp wood, place the wood around the rock circle and let the heat from the fire dry it out.  The more fuel, the bigger and hotter the fire will grow.  Consider how long you will need to keep the fire lit to make it through the night, through your meal or to simply heat yourself up.  It is important to keep the fire going enough to accomplish what you need to do, but not to waste fuel by building a fire larger than what is necessary.
Another consideration to take into when deciding how much fuel to use and how big to build your fire is: whether you are trying to maintain a low profile (not attract unwanted attention) or whether you are trying to attract as much attention as possible (i.e. effect a rescue by signaling help).  Hopefully you will never find yourself in a desperate life or death situation where the odds are stacked against you and a fire is the only thing standing between you and survival, but if you are I hope you will remember this article (or others like it) and be able to do what’s necessary to stay alive and thrive!

Tuesday, August 13, 2013

Water: Purification Methods

When Lewis and Clark explored the nation’s vast interior in the early 1800s, they actually obtained some of their drinking water directly from the Missouri River. Amazingly, they didn’t do anything to purify it, other than when Lewis and Clark explored the nation’s vast interior in the early 1800s, they actually obtained some of their drinking water directly from the Missouri River. Amazingly, they didn’t do anything to purify it, other than probably leave it sit in barrels so that the silt would drift to the bottom. Today, of course, if you did that, you’d become extremely ill; after a hard rain, the river is filled with all sorts of pollution, including poorly treated sewage overflow from waste water treatment plants. The upshot, for preppers, is that you have to get used to the idea that we no longer live in a pristine world, and even if civilization collapses, it’s not going to revert immediately to its unspoiled state. Thus, whether you resupply from a stream or from rainwater, it’s not safe to drink that water without treating it to remove harmful substances and pathogens that can make you extremely ill.

Fortunately, according to Practical Preppers’ Scott Hunt, water purification is something that preppers can easily accomplish, thanks to a multitude of technologies that are available, ranging from the old standby of boiling water, to ceramic filters and ultraviolet light. As prepper author James Wesley Rawles notes, various purification methods may remove one sort of contaminant or pathogen, but let others slip through. Treating water with chlorine will kill bacteria, but not all viruses, for example, and no filter system is 100 percent effective at removing herbicides and pesticides that may contaminate an open body of water. So if you filter water, you’d be smart to use distillation, ultraviolet sterilization, and/or chemicals as an additional precaution. One how-to manual that gives a detailed rundown on pathogens, contaminants and various methods of water purification is the Handbook to Practical Disaster Preparedness for the Family, by Arthur T. Bradley and several co-authors.

Here are some tips on how to make sure that the water you collect is fit for drinking and other uses.

  • Know Your Water. Hunt recommends testing the water source in advance to determine what sort of microorganisms or contaminants it might contain, so that a prepper can have the right filters to deal with each problem.

  • Master the Easy, Basic Techniques for Killing Bacteria. Boiling is one of the safest and most effective methods of treating water, according to the Federal Emergency Management Agency. In a large pot or kettle, bring water to a boil—you’ll notice the bubbling and steam streaming out out the vessel—and keep it there for one minute. (Keep in mind that some of your supply will evaporate, so don’t let it boil too long.) Then let the water cool to a temperature that’s comfortable for drinking. Boiled water will taste better if you re-oxygenate it by pouring the water back and forth between two clean containers. Another way to kill loathsome critters in your water is to treat it with bleach. Use a regular, unscented variety that contains 5.25 to 6 percent sodium hypochlorite, and buy a lot of small bottles, because bleach’s potency diminishes after it’s opened. To treat water, add 16 drops (1/8 of a teaspoon) to a gallon of water, stir and let stand for 30 minutes. Hunt notes that ceramic filters provide good protection against bacteria, and they don’t require any energy expenditure—just gravity. “You just dump the water in the top, and it filters down,” Hunt explains. “The bacteria can’t get through the top.
  • Use Distillation to Get Rid of Really Nasty Stuff. Distilling water will remove microorganisms that somehow survive bleach, boiling, and other methods. In addition, it will remove heavy metals, salts, and other chemical pollutants that can harm your health. Basically, the process involves boiling water so that it leaves behind all the stuff that has contaminated it, and then collecting the vapor and allowing it to condense back into liquid water. You can create a simple distilling apparatus simply by suspending a cup by attaching it to the inside of a large pot’s lid, and then putting a layer of water in the bottom of pot and boiling it for 20 minutes. As the pot cools afterward, the water that drips down into the cup is purified. If you’re concerned about using up fuel, it’s also possible to build a solar energy-powered distiller. Here are some simple instructions on that from a prepper blogger.

  • Get an Ultraviolet Light. Large water treatment facilities have used ultraviolet radiation to kill pathogens for years, but small portable units for use in the home or out in the wild have only recently become available. Basically, an ultraviolet purifying unit is a bottle with a small light source that’s inserted into the water. After 30 to 80 seconds, the radiation kills most microbes. Ultraviolet treatment won’t remove impurities such as dirt, metals or chemicals from the water, however, so you’ll have to combine it with another method to get really clean water.
If You Only Do Three Things:
  • Get a Basic Ceramic Filter. This is the lazy man’s way to get rid of bacteria, but Hunt says it’s pretty effective.

  • Stock Up on Bleach. It’s great for killing microorganisms that can may you really sick.

  • Boiling Water is a Really Easy, Quick Method of Purification. You can bring a pot or kettle of water to a boil and keep it rolling for a minute, let it cool, and you’re pretty safe from bacteria.

Sunday, August 11, 2013

7 Things You Need To Know About Bushcraft

1.   The Blade
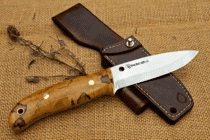
The Cutting blade, the most important tool to the Bushcrafter. It is as important as the sword is to aspyderco-bushcraft-survival-knives warrior or teeth and claws are to the Lion.  A good Bushcraft blade is sturdy and light and is made from the highest quality materials with the tang running the full length of the knife.  With appropriate use, the Bushcrafter can use this blade to stab or cut to give or take life.  ASurvival Knife and a Bushcraft knife has a lot of the same similarities, find out what you need to know before buying a survival knife click here.

2.  Firecraft

The ability to make fire under almost any condition is essential part of Bushcraft survival.  With How to Build a FireFirecraft there are many techniques to building a fire; a fire drill, smoldering plants and trees, sunlight, striking rock that contains iron such as flint,  and of course matches and lighters.  Firecraft in the ability to create, control, and use fire to aid in one’s survival.  Another critical skill in Bushcraft is the ability to transport fire, usually by carrying a burning coal around in some type of dry sage grass to keep it smoldering.  Click on the following links for few things you need to know about building a fire.  Fire Tender – Fire Starters

3.  Knots / Ropecraft

The ability to join two or more pieces of natural or man made material is a vital skill to have for Bushcraft survival.  By joining two or more pieces together, you not only increase the strength of the material but also the usability as shelter, a raft, a weapon or a sled.

4.  Hunting and Trapping

In Bushcraft, hunting and trapping is the pursuit of animals and fish for food.  A mastery of many elements in Bushcraft including tracking and ropecraft lead to the ability to hunt for food by use of traps, nets and snares or weapons that stab and cut.

5.  Shelter

Shelter is an important aspect of every outdoor venture.  Your first layer of shelter is the clothing on your back, this provides you just enough to stay warm and dry for short periods of time. Your second layer of shelter is a stationary structure whether it is a small tent or a full blown log cabin. Knowing how to make shelter for you and your family is an important skill in Bushcraft.

6.  Tracking

Tracking animals and humans is an important part of Bushcraft survival.  Tracks made by humans How to track an animaland animals on the ground, when read correctly, show a pattern of the habits of the animal or human.  Once you establish this pattern, you will have the ability to continuously and carefully observe the animal’s movements and patterns.  It is important to recognize that animals you find in the forest are as much creatures of habit as human beings.  A particular animal you are stalking will follow the same path to and from water each day or to and from a food source.  It will hunt and forage in the same area and only leave when it is driven out by an outside force, predator, fire, flood or drought.  This pattern forming characteristic of all animals makes it possible for the experienced bushcrafter to predict the animal’s movements, and so he selects the sites for his traps, snares or ambush.

7. Foraging

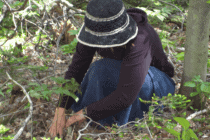
Have you ever looked at a wild plant or bush, and wondered if you couldeat it?  For the edibile plantsBushcrafter, foraging is very important element to survival.  All hunters and fisherman know that if it was easy, they would not call it hunting and fishing, they would call it catching.  Being able to identify and eat plantswithout getting sick can make the difference between surviving and not surviving.

Thursday, August 8, 2013

Dandelions: The weed you need


DandelionGreens2
The dandelion is usually thought of as a pesky and annoying, yet remarkably resilient weed. It is the arch nemesis of the landscape artist and gardener alike.  The battle rages on from spring to fall with this resilient weed.  But, instead of attempting to eradicate them, let’s take note of their benefits.

Apart from being a beautiful yellow and fun for kids to blow the seeds once the bloom dies, this misunderstood plant is actually beneficial in practically every way in which a plant could be. The dandelion:
  • replenishes top soil
  • is entirely edible
  • has a long history of being a medicinal herb.
Dandelions are actually little yellow flags that pop up to tell you there is some type of imbalance to your top soil.  Not a weed that is bent on taking over your tomatoes, but actually an attempt to help aid in their growth by replenishing the soil of what it is missing.

They are actually the initial step in the improving and restoring of a stripped or ruined area of soil back to its balanced and hospitable growing environment.   Their wide-spreading roots loosen hard-packed soil, aerate the earth and help reduce erosion.

image by nathansnostalgiaThe tap root of the dandelion, which is what makes them so hard to kill, reaches deep down into the depths of your dirt to bring vital nutrients to the top soil. The sun, rain, other elements to which the soil is over exposed due to tilling or over growing has removed these nutrients such as calcium. The tap root of the dandelion brings calcium from deep in the soil and makes them available to other plants.  Wherever you see dandelions peering out over green turf and turning it gold, the earth is being rejuvenated!

Go ahead! Eat a dandelion!

Dandelions are actually much more nutritious compared to many of the veggies in your garden. They contain even more Vitamin A than spinach, even more Vitamin C than tomatoes, and are a powerhouse of additional nutrients including Vitamins B and D. They additionally include the vital minerals of iron, calcium and also potassium.

Every component of the dandelion is edible. The yellow flowers make a delicious treat, while the leaves possess even more nutritional content (including Omega 3 as well as 6 fatty-acids) compared to any kind of leaf lettuce you’ll locate in a produce section of your grocer. Dandelion leaves are used to add flavor to salads, sandwiches, and teas. The roots are used as caffeine-free coffee substitutes, and the flowers are used to make wines and jellies.

Nature’s medicine

Dandelions are a green and growing first aid kit. Native Americans boiled dandelion in water and took it to treat kidney disease, swelling, skin problems, heartburn, and upset stomach. In traditional Chinese medicine, dandelion has been used to treat stomach problems, appendicitis, and breast problems, such as inflammation or lack of milk flow. In Europe, it was used in remedies for fever, boils, eye problems, diabetes, and diarrhea.

The main use has been as a diuretic and liver/bloodstream purifier. It stimulates production of bile, which can help break down gall stones. Choline, one of the dandelion’s main constituents, is essential to healthy liver function. The dandelion also contains hydrochloric acid, which helps the digestive system. The milk in the stem can be used as a skin softener, and it has an anti-fungal agent which can help control yeast infections. As a tea, it has anti-inflammatory properties.

The dandelion is your new BFF!

Like many things in life that keep showing up unexpectedly, we may need to take a second look at the benefits found in something so persistent. There are so many uses for the dandelion that was once thought as a weed that I have now taken to cultivating them right alongside my salad greens.  When I see one pop it’s little yellow head in the midst of kale or spinach, it becomes a welcome member of the family. It nourishes my other plants, often graces our table and is in the sustainable first aid kit.

Wednesday, August 7, 2013

Restoring Old Tools to New Glory

In the pursuit of achieving greater self-reliance, I am always gladdened that my lifelong love of woodworking can be combined. Before my writing hiatus, I wrote an article about woodworking without electricity that was greeted with positive comments and some requests for further articles of a similar theme. Since the publishing of the previous article, I have acquired several “new” old tools. Most need restoration to some degree but I believe that there is lot of life left in them.

Now, many may wonder at the need or even desire to use these old tools when power tools are so much easier, efficient, and faster, right? Perhaps, sometimes, powered tools ARE preferable; however, if there IS NO power or if, like me, you truly enjoy learning and using craftsmanship, this may be a road for you.

In the past six months, I have acquired several old chisels, brace bits, hand planes, a camp hatchet, a hewing hatchet, a hewing axe, as well as a scythe. Additionally, my significant other has gotten some old water bath canners, strainers, utensils, and an antique nutmeg grinder that I am trying to restore for her. They all need work but I am confident that they can also be returned to good service.

French Made Mouli Grinder I found in an antique tool place. I picked it up for a couple of bucks and have been restoring it with my Dremel and steel wool.

One might notice a general theme with some of those tools. They are often tools used when shaping and framing heavy timbers. One of my favorite series of books has long been Foxfire and I grew up with centuries old, storied western North Carolinian chestnut and hickory roots, with sawdust in our blood; I have been interested in the art and techniques of shaping or milling timber. In other words, what are the processes for taking a vertically rooted tree, felling it properly, transporting it, processing or shaping it into usable forms? Before there were sawmills, manual sawing, splitting, and hewing were the primary means of converting trees into usable products not meant for the fireplace.

All of those methods were, and still are labor and time intensive. With the advent of water driven saws, then steam turned, and finally modern powered saw mills, it was soon easier to get planked and uniformly sized lumber. The growing availability of this lumber led, eventually, to modern stick framing construction methods.

While I will not turn this into a treatise comparing old construction methods with current methods, I will say that there is a growing body of evidence that demonstrates that what building methods that were used for centuries throughout the western cultures and even in Japan is more efficient in terms of energy used for environmental comfort and even in the actual construction and maintenance of structures. Simply put, the older methods are proving to be greener, in many cases, than current construction methods. This is bearing out as a new trend is growing in the building industries that are combining old methods with new technology and materials to achieve higher levels of building and energy efficiency. What is old is new again.


Great points but how does this apply to us?

Consider this, the power becomes intermittent or non-existent (pick your reason du jour –EMP, CME, asteroid strike, economic chaos, etc). You and yours have survived to this point. The building materials at the big box stores are not easy to come by. You HAVE to build some structures for a variety of reasons. How do you take those trees that most are burning up for wasted heat and turn them into useful forms? Even if you have a couple of books lying around, do you have access to the TOOLS to do this? If you had these skills and the means, prior to needing them, how marketable would they prove to be? Imagine how much food, clothes, ammunition, medicine, or other skills and services you could get if you could build a structure or you could fashion needed things out of suitable timbers? This is the essence of bartering.

Or to make it more relevant, how about having the skills and means to craft things simply because you learn to LOVE the feel of a quality tool in your hands as you use it on God’s own bequest to us to do what humans do- create objects of functional beauty. You may discover a latent need to connect with our vestigial love of creating with wood in ways you cannot now fathom, nor appreciate.

Surely, I romanticize this to a degree but that is how I do feel about the process. For the more spiritual amongst us, there is, at least from my worldview, a degree of stewardship in this, as well. For those of a like mind, we are called to be stewards of the world and this is a remarkable manner of exercising stewardship…..but I digress.

Before ANY of the previously described things can be achieved, tools must be acquired. Where do we get these tools? What do we get? How do we restore them? How do we maintain them? How do we use them?

As I intend this to be a series of articles, I fully expect to answer these questions in some detail. But to answer the first question let us thinks outside of the box and we will discover follow on questions, as life always proves.

Where do we get these tools?

I haunt flea markets, garage, and yard sales. I brake for tools. I am a bit of a tool geek, like that (insert Tim Allen grunts now). While it is fun to get a great deal on a used power tool, when you live in an area like mine, it is possible to find some interesting old manual tools. Understand your area, and you will understand what to look for. I live in an old blue collar east coast industrial town with a colonial history of tradesmen living and working in trades like the maritime, steel, and war industries. As a result, many people will have tools handed down from their grandfathers that were used in pipe fitting, carpentry, mechanics, etc. While the carpentry tools are great for my interests, I have to go to the eastern shore or western Maryland or to parts of Pennsylvania or back south to find tools more long the line of timber processing tools. The area and its history and historical economy have a lot to do with availability of tools. However, this is NOT a hard and fast rule, I have found.

We have large flea markets and salvage sales in my area. Invariably, there are “antique” or junk dealers located there. These tend to be the guys in the dusty corners of poorly lit buildings with a labyrinth of warren like paths of tables and ramshackle areas of used wares. It is a cornucopia of treasures really. Most of these guys are older men with a sense of history that often are fascinating to talk to. One of my favorite gentlemen is a World War II vet and his friend the Korean War vet and we have literally talked for the better part of an hour as we discuss tools, compare war stories, and haggle over prices. Believe me, it is always time well spent.

The next place to look is in your relatives’ garages, barns, etc. I have heard of excellent finds this way. Most people have little appreciation for these tools and view them as rusty clutter. Maybe you can get them and do something with them and it becomes a win-win for all parties.

You can look online. Craigslist is a favorite resource for me. I have gotten many things from there. Sometimes they are good deals, other times they are not. It is buyer beware. But for all the bad things I have gotten from Craigslist, I have bartered rabbitry equipment, outfitted half of my wood shop, reclaimed lumber, gotten chainsaws, and there are rumors that I may or may not have gotten some thunder sticks, as well. Tools can be found there easy enough. Amazon can be a good resource, I am told. However, for the truly hard to come by, I have availed myself of Ebay.

Ebay is not something you just jump into. I would suggest two basic things before you wade into these waters for tools. First, research the tools. Read about them online, talk to old woodworkers (go to your local Woodcraft or Rockler store for some old wood butchers to talk to), look up images of them, read old books, watch some Roy Underhill or other Youtube videos. Get an idea of how tools are made. Cutting tools tend to have two types of steel if they were purposely made to be tools. The tools have a different temper for the areas that lead to the cutting edges to make the cutting edges more hardy and keen while the body tends to be softer for economy and resiliency’s sake. IF the cutting edge is ground two deeply, then you might want to pass on cutting tools. Second, have a price point that you want to spend with a cap. Auctions are competitive and it is easy to get caught up in the moment and overbid on something.

Monday, August 5, 2013

Growing Food in Different Climate Zones


Starting a new fruit or vegetable garden can be an exciting time, and it can be difficult to know where exactly to begin. Even experienced gardeners can find themselves overwhelmed when trying to grow food in a completely new climate. Which crops grow best? How long is the growing season? When is the last average frost date (assuming you aren’t living in a tropical zone)? These are the sorts of questions to start with. Fortunately, the US Department of Agriculture (USDA) has a nationwide standard of splitting the country up into 11 basic hardiness zones based on the area’s coldest average temperatures in winter. Their interactive USDA Hardiness Zone Map is therefore an excellent place to start.
Once you identify your region’s USDA climate zone, you can get a good idea of factors such as how long winters last, how cold it gets, the length of the growing season, and which food crops can and can’t thrive.
The USDA hardiness definitions and map does provide a great basic framework to get you started, but keep in mind that it does have its limitations. Because hardiness is only measured by the coldest temperatures of the year, it doesn’t take other climate factors into account. Some of these can include: the amount of precipitation, humidity, maximum temperatures and soil conditions. Both the high deserts of New Mexico and much of Connecticut, for example, are USDA Zone 6a, but their climates are still completely different. If you happen to live in the western United States, for example, and you’d like a more specific climate zone map, Sunset’s detailed climate zone map takes much more into account, helping you pinpoint your area’s overall growing conditions.
Before you get planting, you should also be aware of micro-climates, which are basically mini-climate zones created by features like bodies of water, parking lots or, more likely, the walls of your home. Taking advantage of micro-climates in your garden can help ensure that you’re plantings will thrive.
For more information on your region’s growing conditions, as well as help with common pests, soil amendments and other gardening stuff, consider visiting a local nursery, botanical garden or County Extension Office.
Each USDA climate zone has its own planting schedule, and has two basic growing seasons: warm and cool. The cool growing season, perfect for growing carrots, greens and radishes, takes place every spring and fall, and sometimes winter in the warmer zones. The warm growing season, featuring tomatoes, corn and squash, gets going in late spring and lasts through early fall. Growing seasons in the sub-tropics and the tropics work a little differently, as the growing season technically lasts all year. Their planting times are generally based around annual rainfall patterns.
Below is a basic overview of the 13 USDA plant hardiness zones. Note that you can extend your growing season by utilizing micro-climates and by offering protection from the cold with row covers or cold frames.
Zones 1-2
Located in Alaska, the northern continental US and high mountains, this zone is defined by long, cold winters and a very short growing season.
Growing season: April – September
Coldest temperatures: -60 to -40F
Best plants to grow: Vine tomatoes, lettuce, kale, broccoli, asparagus, eggplant, other vegetables with short time between planting and harvest
Zones 3-4
Located in the northernmost US states and cool mountain regions, these zones enjoy a slightly warmer and longer growing season with very cold winters.
• Growing season: April – October
• Coldest temperatures: -40 to -20F
• Best plants to grow: Vine tomatoes, lettuce, kale, broccoli, asparagus, spinach, strawberries, eggplant, sweet peas, pole beans, winter squash, red and white potatoes
Zones 5-6Encompassing much of the continental US, these planting zones stretch from Washington and Oregon, down to New Mexico, and across the midwest to New England.
• Growing season: March – October
• Coldest temperatures: -20 to 0F
• Best plants to grow: Tomatoes, corn, squash, melons, beans, strawberries, lettuce and other greens in the spring and fall
Zones 7-8
Defined by long, hot summers and mild winters, these zones cover much of the southern US, including the desert southwest and many southern states.
• Growing season: March-November
• Coldest temperatures: 0 to 20F
• Best plants to grow: Corn, tomatoes, melons, squash, collard greens, carrots, bush beans, asparagus and leafy greens during the cooler months
Zones 9-10
These sub-tropical to mild temperate growing zones cover much of the deep South, the Gulf coast, most of Florida and southern California. If protection is offered, the growing season can last throughout the year, though the occasional frost may still occur.
• Growing season: February-November
• Coldest temperatures: 20 to 40F
• Best plants to grow: Tomatoes, melons, squash, corn, peppers, yams, citrus, peaches, figs, bananas, salad greens and sweet peas during the cooler months
Zones 11-13
Found only in Hawaii and the US territory of Puerto Rico, these tropical growing zones feature a tropical climate and year-round growing season with planting times based around the wet and dry seasons.
• Growing season: Year-round
• Coldest temperatures: 40 to 70F
• Best crops to grow: kale, okinawa spinach, pole beans, passionfruit, sweet potato, red potato, cassava, pineapple, pumpkin, mango, papaya, Thai chili peppers, citrus, bananas, taro
• Crops to avoid: Any fruits requiring chill time, including berries, cherries, apples and peaches
Growing your own food is a fun, family-friendly hobby with tasty and nutritious rewards. Whether you’re a newbie trying out your first tomato plants, or a seasoned pro moving to a new state, understanding your garden’s climate zone is the first step towards planning and growing a successful, productive garden.

Saturday, August 3, 2013

I can do all things through Him that strengthens me...

There are no words to describe what you're about to see. 

A Son asked his father, "Dad, will you take part in a marathon with me?" The father who, despite having a heart condition, says "Yes". They went on to complete the marathon together. Father and son went on to join other marathons. The father always saying "Yes" to his son's request of going through the race together. One day, the son asked his fater, "Dad, let's join the Ironman together."

To which, his father said "Yes".

For those who don't know, Ironman is the toughest triathlon ever. The race encompasses three endurance events of a 2.4 mile (3.86 kilometer) ocean swim, followed by a 112 mile (180.2 kilometer) bike ride and ending with a 26.2 mile (42.195 kilometer) marathon along the coast of the Big Island.

Father and son went on to complete the race together!


Friday, August 2, 2013

Bug Out Bag - First Aid


First aid equipment should always be water-proofed, and using ziplock baggies is inexpensive, light-weight & easy. If I go any where, first aid items are always with me:

  • EMT Sheers (1)
  • Ace Bandage (1-2)
  • 2 in. Coban wrap, 2+yards in length
  • Gauze Wrap (5)
  • individually packaged, then all in their own larger water proof bag

The items below are in their own large water proof bag, some items are grouped together in smaller baggies for ease of use and for organizational purposes. This is the ziplock bag I carry everywhere, it never leaves my Bag.

  • Moleskin and Blister bandages
  • Extra pair of boot laces
  • Small bottle of Tylenol
  • Medium mixed bottle of Ibuprofen, Naproxin, and Excedrin
  • A couple tabs of Sudaphed
  • Gold Bond body powder (travel size)
  • Blistex lip balm
  • Butterfly bandaged
  • Super Glue (liquid bandage)
  • Assorted Band-Aids (20)
  • Alcohol wipes
  • Neosporin
  • Eye drops
  • 1/2" water proof adhesive tape
  • Folding toothbrush (travel size)
  • Tooth paste (travel size)
  • 1" Coban wrap, 2+ yards