Why?

This blog is to help you in preparing for an emergency. It also contains other information that you might find spiritually up-lifting. This is not an official website of "The Church of Jesus Christ of Latter-day Saints". This site is maintained by Barry McCann (barry@mail.com)

Wednesday, May 15, 2019

Why Wool Blankets Should Be Part of Your Preps


Wool blankets have a long history that can be difficult to trace. However, for many people, especially in North America, the idea of a wool blanket may bring images of Native American trade blankets, or military blankets to mind. 
Made famous first by the Hudson’s Bay Company, and later by Pendleton Mills, wool trade blankets have become cultural icons in their own right, and in the case of modern Hudson’s Bay blankets, they carry eye watering price tags that put them squarely in the realm of luxury goods. 

Today, wool blankets might seem like a quaint, outdated item, or something found in an army barracks or surplus shop. However, the same qualities that made wool blankets invaluable trade goods in North America also make them invaluable to the clever prepper. 
While a good wool blanket can be heavy, they deserve a place in your prepping and off grid plans, and here is why…

Old School Gore Tex?

You know, or should know the old survival tip of never wearing cotton clothes in the woods. Cotton gets wet, and soaks up moisture like a politician sucks up other people’s money, and is about as pleasant to deal with. 
Wool on the other hand can keep you both warm and dry, even when the fabric is wet. How wool works is all sciencey and technical and stuff, but the short answer is that it just works. Kinda like magic, only for real. 
Our ancestors understood this unique property of wool and made blankets and clothing from it. There was a reason soldiers wore wool uniforms for centuries, and why blankets often doubled as cloaks, or outerwear in inclement weather.
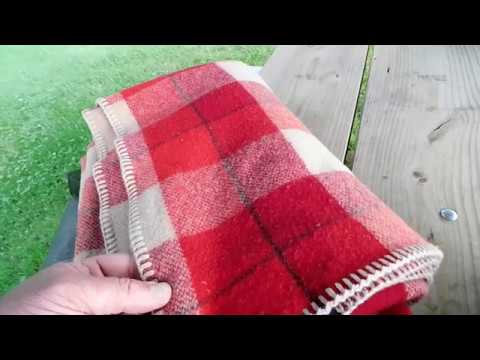
What this boils down to, is that there is a reason Native Americans and pioneers alike wrapped themselves up in wool blankets when outside. Soldiers were issued blankets long enough to roll up in, as a sort of primitive sleeping bag arrangement, while mountain men made use of Mackinaw blankets, and cowboys developed the bedroll of waterproofed canvas and a woolen blanket. The end result always came back to making the most use of the all weather warmth and protection the wool blanket afforded – much like we use Gore Tex today.
I’ll come back to some of this traditional uses of wool blankets in a bit, but let’s come back to the present moment. Wool blankets are heavy, can be scratchy, and when wet get even heavier. They are also bulky, and sometimes are cheaply made with scrap fiber and wool, greatly reducing their utility.
On the other hand, modern synthetic fibers are light, often waterproof, and can wick away water like nobody’s business. There is no arguing that Gore Tex like fabrics are superior in many, or all cases (there will always be exceptions and outliers), and a good bivy cover will keep you warm and dry.  So why should a modern day prepper even cast an eye towards the seemingly obsolete wool blanket?

Because they bloody well work. 
There are two main reasons to look at blankets – one is for your home, and one is for bugging out. I wouldn’t take a wool blanket bugging out unless you are doing it in a vehicle. Ounce for ounce, there are superior choices for bedding or clothing out there. If you are on foot go with modern fibers, when you can.
Of course there are exceptions to every rule, but first, let’s look at blankets on your homestead or elsewhere.

Wool Blankets At Home

I’ve got an old army blanket folded up in my closet, and another wool blanket rolled up with my “bug in” supplies. Fact of the matter is, when it gets cold, both of them come out, and I save a few bucks on heating, and enjoy being toasty warm. My cat likes it too, which tells me I’m on the right track there. 
Premium wool blankets are pretty comfortable things, while cheaper army blankets can be scratchy. Still, it’s nothing a sheet or light blanket underneath them won’t help, and the end result is the same. A warm blanket that can help see you through the coldest weather.
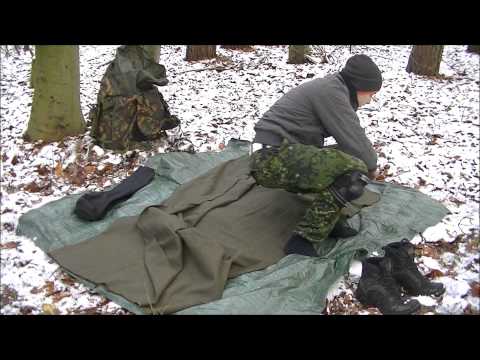
However, other than providing highly efficient warmth, wool blankets play other roles on the homestead. If you are trying to conserve heat, it is a common tactic to hang blankets over doorways to isolate rooms, permitting heating only those rooms you are using. You can also hang a blanket over windows to hold heat inside. The heavy, dense nature of a wool blanket make them ideal for this sort of use. 
Now there is one other reason why you might want to use wool blankets at home or your off grid retreat…

Natural Fibers For The Win

Now I personally have no issue with synthetic fibers, but there are a lot of reasons to favor natural fibers whenever possible. Certainly there is something to be said for making blankets or clothing from wool which is sustainable and can be harvested from organically raised sheep, as opposed to petroleum based fibers. 
If you have an objection to synthetic fibers, or simply prefer something closer to nature and more honest, then it would make perfect sense to equip your home with wool blankets. If you have a sensitivity to chemicals, you may find wool blankets beneficial as well, especially when they haven’t been treated with flame retardants or other weird stuff.

Another nice thing about wool blankets is that they breath and wick moisture away from you when sleeping. This can be a distinct benefit when sick and sweating – it’s never fun to wake up all hot and sweaty, and a wool blanket can help you feel a bit better when ill. 
The straightforward conclusion to all this is that wool blankets are comfy – especially if you get a high quality commercial blanket. But well made highly functional consumer goods need little justification for their use, and should be acquired by preppers whenever they fit into their lifestyle and budget. Let’s go back to the past, which is where we can find some other cool uses for wool blankets.

The Civil War Blanket Roll

You’ve probably seen pictures of Civil War soldiers with a rolled blanket draped over their body. This simple way of carrying your blanket and a few small items was popular with soldiers who couldn’t acquire a proper knapsack, or who might have just preferred the blanket roll approach. 

The modern prepper might be well served using a blanket roll when bugging out in a hurry, or simply taking a minimalist hiking trip or walk. If you have a good wool blanket, an argument could be made for carrying it in lieu of a sleeping bag in some cases. 
A blanket roll can be used to carry spare clothing and a few other small items, but remember, it is always best to keep the roll small, which means putting very little inside of it.

The Cowboy Bedroll

A more advanced form of the blanket roll, the cowboy bedroll is also heavier, meaning you’ll probably want to use this when travelling (or bugging out) by vehicle or horseback, however, it is possible to make them portable – it’s just not a common thing.

The cowboy bedroll uses one or two wool blankets, and a large canvas tarp to create a sort of sleeping bag. Honestly, a sleeping bag probably is the superior choice, but a good cowboy bedroll also doubles as a bivy bag, making it an excellent choice for all weather use. If you can reliably carry or transport one, a cowboy style bedroll can be an excellent prepper choice if you don’t have access to modern sleeping and bivy bags. 

As Outerwear

I’ve already alluded to the way Native Americans wore blankets as outerwear. Ponchos are a variation on this same theme. Today’s preppers have the advantage of all manner of jackets and coats made from wool or advanced synthetics, but there is something to be said for wearing a nice wool blanket in woods during a Pacific Northwest autumn rain.


An old or worn down blanket can be quickly converted into a poncho by cutting a hole in the middle of it, making it a clever, frugal way to repurpose blankets that are past their prime, or that you found at a yard sale. 
If you plan to use a wool blanket as a wrap, you’ll want one long enough to cover your body, but light enough to wear. Don’t expect it to keep you perfectly dry in a rainstorm, but in most cases, especially with a well made, tightly woven blanket, it will keep you both warm and dry, even in wet weather. 

Conclusion

Wool blankets have served native peoples, fur trappers, pioneers, soldiers and homesteaders for thousands of years. Today, they tend to be a luxury good, and have been replaced by synthetics. Once an all purpose item of gear that was both bedding and protection from the elements, today’s preppers can still make great use of wool blankets, but some of their historical uses are probably best left in the past in the name of efficiency. But in a pinch, it’s nice to know that blanket can do more than just sit on your bed until you go to sleep!

Sunday, May 12, 2019

How To Build An Emergency Water Filter

How To Build An Emergency Water Filter

Preppers, how do you filter water in an emergency... without a filter?  Filtering water is not something most people normally spend much time thinking about – after all, the water that comes out of your sink is perfectly safe to drink. But during an emergency or in a survival situation out in the wild, you cannot take potable water for granted. In those situations, knowing how to purify water without a filter on hand or how to make a water filter in the wild can be the difference between life and death.
Thankfully, there are a number of survival water filter DIY methods that can work in a pinch and require only materials that you are likely to have on hand around the house or can find in the backcountry. This is a case where studying these methods a little bit ahead of time can make an enormous difference in your ability to survive in an extreme situation.  Also be sure to check out our field tested review of the Katadyn Hiker Pro as a great backup water filtration system to keep handy for emergency situations (or to barter with).

4 Easy Methods For Filtering Water In An Emergency

1) Sand and Charcoal Water Filter

One of the simplest filters you can learn how to make in the wild or at home is a sand and charcoal filter. This water filter will not purify your water, but it does an excellent job at turning very dirty and cloudy water into clear liquid that can then be boiled to remove microorganisms.
To make this filter, you will need sand, some gravel or small rocks, charcoal from a wood fire, a container such as a hard plastic bottle or a plastic bag, and a coffee filter or a fabric that water can pass through. If you are using a bottle as your container, take the cap off and cut off the bottom of the container, then invert the bottle. If you are using a plastic bag, leave the top end open and cut a small hole in the bottom of the bag. Push the coffee filter or piece of fabric to the bottom (cap end) of the container or bag so that it is covering the hole, then add an inch or two of charcoal. On top of the charcoal, interleave layers of sand and gravel so that you have at least two layers of each.
Once the filter is set, you can hang it from a tree branch or simply hold it suspended over a collection container and pour dirty water into the top of the filter. The water that comes out should be relatively clear, but you’ll need to purify it either by adding chemicals or by bringing it to a rolling boil for five minutes before drinking.

2) Evaporation Trap for Collecting Water

If you are planning to rely on filtering your own water for a long time, building an evaporation trap is a significant time investment but can serve as a semi-continuous source of filtered water. To make this, you’ll need to find an area that sees direct or indirect sunlight throughout the day and then dig a hole that is about one to two feet deep and a few feet around in that spot. Once the hole is dug, place a collection container in the bottom of the pit – be sure that no dirt gets into the container in the process. Place a plastic sheet so that it covers the entire pit and use rocks or branches to hold it down somewhat tightly. The last step is to place a small rock in the center of the plastic sheet, just over the collection container so that the sheet dips down over it.
The resulting trap should allow water to evaporate out of the soil in the hole when the sun hits it, but the plastic sheet will prevent it from going far. The water will then drip down to the depression in the center of the plastic sheet, right over the collection container. Unfortunately, in order to drink the water you will still need to purify it by boiling or with chemicals, which requires undoing and redoing the plastic sheeting each time.

3) Solar Still For Collecting Water

Just like the evaporation trap, it is possible to make clean water using the power of the sun with a solar still. This method uses a large mixing bowl from around your house rather than a pit, and you will need to have unclean water to fill the bowl with rather than relying on groundwater. To make a solar still, place a cup or can inside the bowl of water so that the rim of the cup is below the rim of the bowl but remains above the level of the water. Cover the entire setup with plastic wrap and place a rock or other weight directly over the cup. Just like for the evaporation trap, the water will evaporate when the sunlight hits its, collect on the plastic wrap, and then drip into the collection cup. Again, this water will need to be purified with chemicals or by boiling prior to drinking it.

4) You Can Use Household Chemicals to Purify Water

If disaster strikes when you are at home, chances are high that you already have a stash of chemical treatments around the house that can be used to purify water without a filter. When using chemical treatments, it is important that you have water that is relatively free of particles – straining dirty water through a t-shirt, cloth, or whatever fabric you have on hand will work, and folding the fabric a few times will increase its filtering power.
The first chemical to turn to is bleach. Almost every household has a container of bleach around – just check under your sink or in your laundry room if you are not sure. To purify pre-filtered but potentially bacteria-filled water, simply add 1/8 teaspoon of bleach per gallon of water, mix, and wait at least and hour before drinking. If the water does not smell of chlorine 30 minutes after adding the bleach, you should repeat the process since your bleach may have exceeded its stable shelf life.
If you have a pool, the chemical in pool shock, calcium hypochlorite, also works well to purify water. Pool shock is extremely potent and stable for up to a decade, in contrast to store-bought bleach. You’ll need to dilute the shock powder by adding ½ teaspoon to one gallon of water, then add that to water at a concentration of 1% (approximately 2.5 tablespoons per gallon of water).
You may also find iodine in your medicine cabinet, which is okay for short-term use as a water purifier but can be dangerous for pregnant women or people with thyroid problems. Add 20 drops of 2% iodine solution to each gallon of water, mix, and wait at least an hour before drinking.

Filtering and Purifying Water Can Be Easy!

While these DIY survival water filters may not produce water that is 100% free of particles, they can turn water that is too dirty to drink into a viable source of sustenance. Some of the methods are perfect for short-term survival, while others, like the evaporation trap, are more suitable as long-term survival solutions for when you will be staying in the same spot for days or weeks. Remember that with any of these filtration methods, you will need to purify your water using the chemical methods described above or by bringing it to a rolling boil. Therefore, it is important to stock your emergency preparedness kit with chemicals for purification or with a significant stockpile of fuel for boiling large volumes of water.
Knowing these methods could be the difference between life and death in an emergency situation!  However, an easier way is to simply have a small portable water filter handy.  Check out our field tested review for the Katadyn Hiker Pro here.  We think its the best all around water filtration system for emergency situations!

Happy Mothers Day!


Thursday, May 9, 2019

9 Ways to Open a Can Without a Can Opener


9 Ways to Open a Can Without a Can Opener
What good is a pantry full of canned goods without a can opener? If you’re like me, you forget the most obvious items, like charcoal when you head to the lake to camp and a can opener for your pantry. Do you know how to open a can without a can opener?
Truth be told, I didn’t for a long time. Then, we had a house fire, and our electric can opener was toast – literally. Without thinking, I purchased some canned soups to make at our makeshift home until ours was renovated, only to realize – I didn’t have a can opener. What was I going to do, especially in SHTF scenarios?
Hindsight, it was no big deal, but it sure felt like one at the time. Finding yourself without a can opener can happen at any time, whether that’s on a hike, a road trip, camping, or when you bug out after an emergency.
Never worry. You can try a few tricks!
What will you do when you don’t have a can opener in your stockpile? Here are nine ways to open a can without a can opener. 

Tin Snips

Perhaps the easiest and safest way to open a can without a can opener is with tin snips. All you have to do is take the snips and cut the outer rim of the can off. It’s pretty easy, but there is a good chance you don’t have tin snips with you.

Large Knife or Machete

large knife or machete might be your first choice, and you probably have an idea on how you will use this. It’s a bit tricky compared to other options.
Put the can vertically and put the tip of the blade on the outside surface. Hit the end of the handle; the tip of the knife will pierce the can after a few hits. Use your knife and slowly work around the can.
Don’t have a knife? That’s a bummer, but you can try a very similar method using a screwdriver, a chisel, or any tool with a similar shape. If you have a hammer, you can easily beat almost anything into the side of a can. The job becomes just a bit easier!

Fork

To open a can with a fork, put one of the prongs on the can’s outside edges. Press down hard until the prong puts a hole in the lid. Make sure the prongs are facing away from you, along with one of the prongs inside the top. Move the fork up and down, slowly tearing the metal, as you turn the can.
Once the hole is large enough, you can remove the prong and use the handle of the spoon to open the can the rest of the way.
This trick works well to open a can but make sure you don’t use your family’s heirloom silverware. Wear gloves as well, because it takes time and your hand is going to hurt if you don’t!

Spoon

Feeling skeptical about using a spoon to open a can? I know I was at first too. There is no way that a spoon can open a metal can, right?
Wrong! You can use a spoon to make a hole in the lid. Then, use the spoon to open the lid like a regular can opener. The only negative is that it can hurt your hands, so wear some gloves.
Don’t believe me? Check it out here!

Axe

Who doesn’t love an opportunity to use an axe?
To open a can with an axe, you need to pierce the side of the can with the axe blade. Cans roll, obviously, so this can be a little tricky. The best trick is to lay the can on its side and holding the can with your hand on the opposite side you to intend to strike.
Quickly hit the can with the corner of the blade. Once you made the first impact, slowly work the blade around the edge of the entire can.

Chef’s Knife

Using a chef’s knife to open a can is similar to using a large knife or a machete. The difference is that the knife has a blade that goes below the handle.
So, to use a chef’s knife, you will want to push that lower edge into the top of the can. Work the knife around the side, just like you would with a regular can opener.

Concrete or a Flat Stone

This method is for someone who has patience and doesn’t mind a bit of a mess. To use concrete or stone to open a can, rub the lid over the concrete or stone repeatedly until it wears down through the rim.
It’s going to take time, and you need to be careful. Metal shards and concrete will spread around, possibly getting into the food you worked so hard to open.

Metal File

Using a metal file is the same idea as concrete, but you can do this with the can upright, which stops the contents from spilling out. You use the metal file to file off the top rim; then you can pop off the lid with a spoon or something that can get leverage under the top.
The big concern with using a metal file is the metal shavings that can easily get into your food and be stepped on around the campsite. That’s not appealing.

Flat Nose Pliers

If you have a pair of flat nose pliers, you’re in luck. You can take the pliers, pinch and twist the outside rim of the can. Keep doing this around the entire side of the can, which will carefully break the seal of the can. Once the seal is gone, you can use the pliers to grab the edge of the lid and pull upwards, removing it.
Canned food is a staple for any prepper’s pantry, and they’re a fantastic asset in your survival supplies. However, without a can opener, most people would be stuck hungry because they don’t know how to open a can without a can opener.
That’s why learning different techniques and figuring out how to be resourceful is essential. All 9 of these methods have decent success. Give them a try at home before you attempt them in a survival situation.

Saturday, May 4, 2019

15 Ways to Use Cinder Blocks Around the Homestead


Homesteading Uses for Cinder blocks

Cinder blocks have an almost limitless number of potential uses. To help spark your imagination, though, here are just a few innovative ideas for how to use cinder blocks around the homestead:

1. Build a Fire Pit

Cinder blocks can be used to construct a very attractive and fully functional firepit for a very low cost. You can find a wide range of designs online, complete with instructions on how to build them, or you can create your own.
Either way, a cinder block firepit can make for a great addition to your backyard.

2. Create Shelves for Your Root Cellar

Putting shelves up in your root cellar can be a great way to better organize the food that you are storing and make the most of the space that you have available. With cinder blocks, creating effective shelves for your root cellar is a very simple process.
All you need to do is stack cinder blocks on top of each other to create the support columns for your shelving then use wooden boards for the actual shelves – no other effort or building materials required.

3. Build Steps

Building steps is one of the most common DIY uses for cinder blocks. Cinder block steps are easy to build, are fully practical, and are affordable.
With a little effort and an eye for design, they can actually look quite nice as well.

4. Build a Raised Bed Garden

Raised bed gardens are often beneficial for certain areas and certain plants. They can also have an appealing and unique look that is able to improve the aesthetics of your garden as well.
With the right soil and enough cinder blocks, building a raised bed garden that is fully functional and great-looking is a quick and easy project.

5. Make a Cinder Block Bench

Cinder blocks can serve as the base for a creative outdoor bench. Of course, cinder blocks themselves are not especially comfortable to sit on, so you will likely need to cover your bench with wood and/or some type of cushioning.
Whatever you use to cover the top of your bench though, cinder blocks provide plenty of support for the bench itself.

6. Make a Cinder Block Stove

It’s always nice to cook outdoors from time to time. While purchasing a grill is always an option, you can also go the DIY route by making an outdoor stove using cinder blocks.
You can find plans for building a cinder block stove online, but the construction is typically simple enough to figure out just by looking at a picture of the completed stove.
Also, one of the best parts about building a cinder block stove is the fact that it is easy to take apart and rebuild again in a matter of minutes, meaning that your cinder block stove does not have to be a permeant installation.

7. Create a Firewood Rack

Two cinder blocks and four boards are all you need to create an attractive and effective firewood rack. Simply put the two cinder blocks side by side and place a board in each of the four holes in the blocks to create a triangle-shaped construction where you can stack firewood.
Not only does this help you better organize and store your firewood, it also keep sit off the ground in order to prevent it from becoming damp.

8. Use Cinder Blocks as Flower Pots

Filling the holes in a single cinder block with topsoil is all that you need to do to create a great container for potted plants.
Best of all, cinder block flower pots enable you to get creative with your gardening and do things such as build a “living wall” out of plants planted inside of cinder blocks.

9. Create a Decorative Fence

Stacks of cinder blocks can serve as a sort of fence post for decorative fences. All you have to do is stack the blocks so that slots in them are facing outward then rest decorative wood in the slots to create a unique and eye-catching decorative fence.

As with most cinder block projects, building a decorative fence out of cinder blocks also makes it easy to disassemble and remove at any time.

10. Build a Storage Shed

Cinder blocks and cement is all that you need to create the walls for a very durable storage shed.
While you will still have to figure out something for the roof of your shed, cinder blocks make it easy to construct the shed’s four walls in just a matter of hours.

11. Place Borders Around Your Garden

Putting a border of cinder blocks that is one block high around your garden can be an attractive addition to your garden’s design. More importantly, though, this border wall can help keep out small creatures such as rabbits that would otherwise enjoy feasting on the tasty plants inside the wall.

12. Make a Cinder Block Smoker

Yup, you can even build a smoker out of cinder blocks. Store-bought smokers can be very expensive and most DIY smoker plans are a bit too complicated for most people.
This plan, though, is very simple. You just need 24 cinder blocks, a 1/4-inch steel plate and some rebar.

13. Make a Cinder Block Grill

There’s not much required to make a functional outdoor grill.
All you need is something to place the metal grating on and somewhere to build a fire underneath it – and both of these things can be accomplished using only cinder blocks.

14. Build Storage for Your Compost Heap

Stacking cinder blocks into a square shaped container is all that is required to build a great storage area for your compost heap.
The cinder blocks make for a solid and durable container that will help keep your compost from being scattered.

15. Create Cinder Block Planters

You can put these wherever you want. If you have cement steps leading up to your home, cinder block planters will look perfectly natural along the edges of your steps.
You could also put a bunch of them on your front or back porch. Either way, it’s a great way to spruce up the attractiveness of your yard.