Why?

This blog is to help you in preparing for an emergency. It also contains other information that you might find spiritually up-lifting. This is not an official website of "The Church of Jesus Christ of Latter-day Saints". This site is maintained by Barry McCann (barry@mail.com)

Wednesday, June 17, 2015

Dehydrating Garlic For Garlic Powder & Its Benefits

dehydrated garlic finalOne of the most important herbs a person can use is garlic. Aside from giving our dishes a fantastic flavor, it has many health benefits as well. Garlic contains a compound called Allicin.
According to one scientific review, Garlic’s main mechanism involves a molecule called alliin. When garlic is physically disturbed through chewing, slicing, or crushing, it releases an alliin metabolite: allicin. Allicin turns into a variety of fat and water soluble sulfur-containing compounds. In fact, these compounds are so volatile, they give off hydrogen sulfide, which is part of garlic’s unmistakable smell and taste. By tapping into the hydrogen sulfide signaling system, garlic relaxes the blood vessels and provides a variety of health benefits. Garlic also uses the hydrogen sulfide signaling system to exert its anti-cancer effects.
Raw or aged garlic reliably reduces total cholesterol and Low-density Lipoprotein (LDL-C), while increasing High-density Lipoprotein (HDL-C). Garlic also provides a variety of anti-cancer properties. Eating garlic daily (10g or more) is associated with a significantly reduced risk of prostate, colon, and stomach cancer. It can also induce fat loss and adrenaline secretion, though in a minor way. Garlic appears to mildly and unreliably reduce triglyceride levels.

Some other benefits Include:

  • Combats sickness, even the common cold
  • Lowers Blood Pressure
  • Improves Cholesterol Levels
  • Contains Antioxidants that may help reduce the risk of Alzheimer and dementia
  • May help you live longer and improve your athletic performance
  • Detoxify s heavy metals in your body
  • Improves bone Health
That being said, I like to dehydrate fresh garlic and turn it into my own powder. The taste is much stronger and there is no added chemicals or salts. I will walk you threw my process below.
I prefer to use my own home grown garlic but lets face it, we do not always have that and not everyone grows their own. So for this article I am using a 3 pound bag of already peeled garlic gloves I buy at Sam’s for about $5.00.
peeled garlic final

You can chop of the ends if you want but I usually don’t unless its just an extremely large area of hardness. I put as much as comfortably fits in my Ninja blender and pulse it until it has a nice minced texture but not blended and juicy. (Note: the ninja Blender system I got was only about $70.00 Verses the extremely high version for over $200.00. I didn’t need all those extra attachments so I went simple.
Ninja final

Spread minced garlic out onto your Excalibur Dehydrator Tray evenly and then set to dehydrate on vegetable setting. (125° F) If you  do not have a dehydrator tray then you can set your oven to a low setting (under 200°F) and dehydrate them in the oven. You will need to check them more frequently and make sure they are not sticking or burning to your tray. I personally prefer to dehydrate with a tray so my house doesn’t get extremely hot. I also do not like to run up my electric bill using the oven for hours on end. The last time I checked it was .07¢ per hour with the dehydrator.
chopped garlic final

Allow to dehydrate for several hours checking periodically. I like to turn the trays and move the garlic around a little to check the progress. We are going for an extremely dry consistency. No moisture at all. The crunchy effect.
garlic trays final

Once you get a dry consistency you will transfer our dried garlic into a small blender/mixer to blend it into a powder form. I prefer to use the Bella Rocket Blender. I have had it for years and it has never failed me when wanting to make powders or smoothies.
garlic 14 final
Voila!! Homemade Fresh Garlic Powder!!
dehydrated garlic final

P.S. For the very cute and functional ball lids (as seen in picture) that you can use on any wide mouth jar click below:

Tuesday, June 16, 2015

5 Ways To Open A Wine Bottle Without A Corkscrew

Corkscrews have a nasty habit of playing hide and seek on the days you need a glass of wine the most. The stress of every minute that passes as you and your wine bottle wonder what to do next just multiplies the number of glasses you’ll need to wind down. We’ve all been there. But there’s hope. Here are 5 ways to open a wine bottle without a corkscrew.

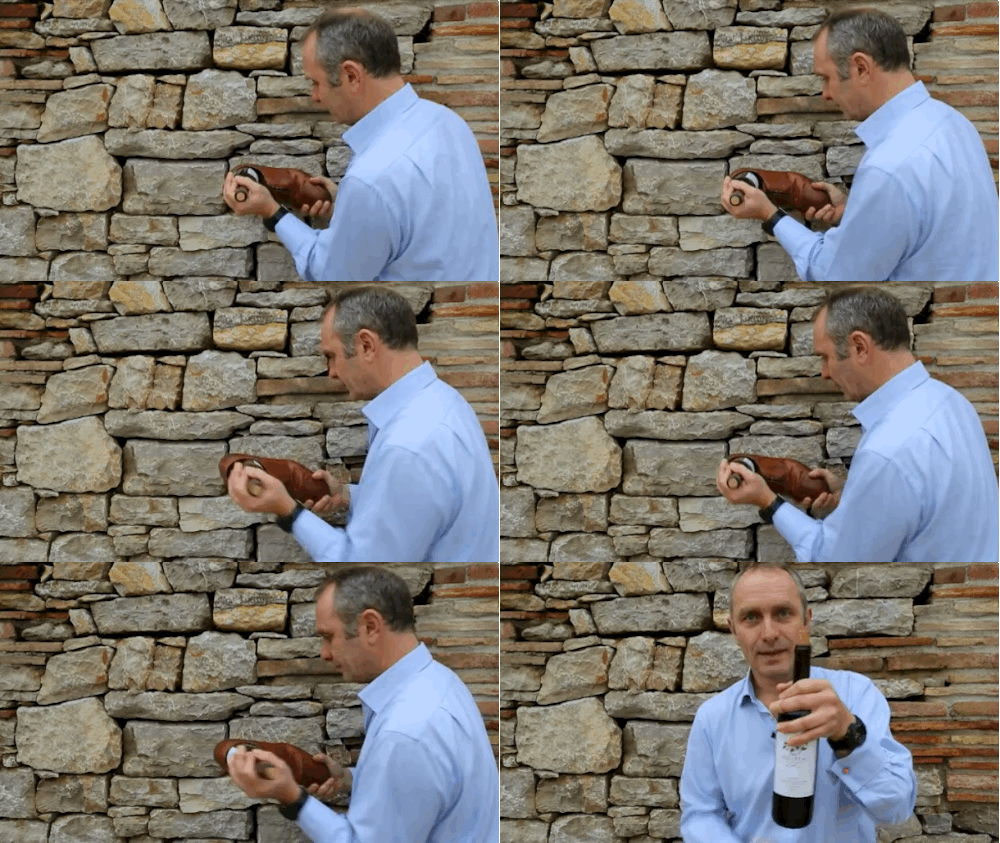
1.  Open it with your shoe

5 Ways To Open A Wine Bottle Without A Corkscrew
Yes, this is a real way to open a wine bottle. Remove the wrapping around the cork first, then place your bottle in the shoe. Give it a few good whacks against a (solid) wall, and watch the cork inch its way out. Voila! You may now proceed with chugging your wine in celebration.

2. Take a hammer to it

hammeropen


Not in the way you’re thinking, although that would be one satisfying way to do it. But to avoid shattering the glass, you’ll also need a screw, which you’ll twist down into the cork. Then use the back of the hammer to yank out the screw and cork together. At this point it will be acceptable to insist all your friends refer to you as Bacchus.

3. Knife it

knifeopen1
(Source: YouTube / CrazyRussianHacker)
knifeopen2
(Source: YouTube / CrazyRussianHacker)
Grab a serrated knife and remove any foil covering. Stick the knife in near the edge of the cork and VERY carefully, start twisting. By pulling up and turning with the knife, the cork will begin to work its way out. When it’s a good bit out of the bottle, but not quite far enough to be pulled the rest of the way by hand, take the knife out and stick it in the side of the cork. Turn and twist until that sweet, velvety goodness flows free.
4. Pump it
pumpopen
Should you find yourself stuck in a bike shop or your garage with a bottle of wine, as one often is, grab the nearest bicycle pump. Wedge the pump into the cork and use some good old fashioned physical and peer pressure to pop it right out of the bottle. This also just looks like a lot of fun.

5. String it


stringopen2


stringopen4

Using a screw driver, or any long, skinny, metal device, make a hole all the way through the cork. Then take a good sized piece of string or rope and tie a knot at the end. Shove that thing down through the hole in the cork, then yank it back out. This will force the cork out, if you’re strong enough. I can’t think of any better reason to start working out than to be able to open your wine bottle, especially in front of judgmental house guests.

Saturday, June 13, 2015

Why Is The World Economy In Trouble? The Global Financial Pyramid Scheme By The Numbers


Why is the global economy in so much trouble?  How can so many people be so absolutely certain that the world financial system is going to crash?  Well, the truth is that when you take a look at the cold, hard numbers it is not difficult to see why the global financial pyramid scheme is destined to fail.  In the United States today, there is approximately 56 trillion dollars of total debt in our financial system, but there is only about 9 trillion dollars in our bank accounts.  So you could take every single penny out of the banks, multiply it by six, and you still would not have enough money to pay off all of our debts.  Overall, there is about 190 trillion dollars of total debt on the planet.  But global GDP is only about 70 trillion dollars.  And the total notional value of all derivatives around the globe is somewhere between 600 trillion and 1500 trillion dollars.  So we have a gigantic problem on our hands.  The global financial system is a very shaky house of cards that has been constructed on a foundation of debt, leverage and incredibly risky derivatives.  We are living in the greatest financial bubble in world history, and it isn't going to take much to topple the entire thing.  And when it falls, it is going to be the largest financial disaster in the history of the planet.
The global financial system is more interconnected today than ever before, and a crisis at one major bank or in one area of the world can spread at lightning speed.  As I wrote about yesterday, the entire European banking system is leveraged 26 to 1 at this point.  A decline in asset values of just 4 percent would totally wipe out the equity of many of those banks, and once a financial panic begins we could potentially see major financial institutions start to go down like dominoes.
We got a small taste of what that is like back in 2008, and it is inevitable that it will happen again.
Anyone that would tell you that the current global financial system is sustainable does not know what they are talking about.  Just look at the numbers that I have posted below.
The following is the global financial pyramid scheme by the numbers...
-$9,283,000,000,000 - The total amount of all bank deposits in the United States.  The FDIC has just 25 billion dollars in the deposit insurance fund that is supposed to "guarantee" those deposits.  In other words, the ratio of total bank deposits to insurance fund money is more than 371 to 1.
-$10,012,800,000,000 - The total amount of mortgage debt in the United States.  As you can see, you could take every penny out of every bank account in America and it still would not cover it.
-$10,409,500,000,000 - The M2 money supply in the United States.  This is probably the most commonly used measure of the total amount of money in the U.S. economy.
-$15,094,000,000,000 - U.S. GDP.  It is a measure of all economic activity in the United States for a single year.
-$16,749,269,587,407.53 - The size of the U.S. national debt.  It has grown by more than 10 trillion dollars over the past ten years.
-$32,000,000,000,000 - The total amount of money that the global elite have stashed in offshore banks (that we know about).
-$50,230,844,000,000 - The total amount of government debt in the world.
-$56,280,790,000,000 - The total amount of debt (government, corporate, consumer, etc.) in the U.S. financial system.
-$61,000,000,000,000 - The combined total assets of the 50 largest banks in the world.
-$70,000,000,000,000 - The approximate size of total world GDP.
-$190,000,000,000,000 - The approximate size of the total amount of debt in the entire world.  It has nearly doubled in size over the past decade.
-$212,525,587,000,000 - According to the U.S. government, this is the notional value of the derivatives that are being held by the top 25 banks in the United States.  But those banks only have total assets of about 8.9 trillion dollars combined.  In other words, the exposure of our largest banks to derivatives outweighs their total assets by a ratio of about 24 to 1.
-$600,000,000,000,000 to $1,500,000,000,000,000 - The estimates of the total notional value of all global derivatives generally fall within this range.  At the high end of the range, the ratio of derivatives to global GDP is more than 21 to 1.
Are you starting to get the picture?
Every single day, the total amount of debt will continue to grow faster than the total amount of money until the day that this bubble bursts.
What we witnessed back in 2008 was just a little "hiccup" in the system.  It caused the worst economic downturn since the Great Depression, but global financial authorities were able to get things stabilized.
Next time it won't be so easy.
The next wave of the economic collapse is quickly approaching.  A full-blown economic depression has already started in southern Europe.  Unemployment is at record highs and economic activity is contracting rapidly.
The major offshore banking centers in Cyprus are on the verge of collapsing.  It was just announced that they will now be closed until Tuesday, but nobody really knows for sure when they will be allowed to reopen.  And there is already talk that when they do reopen that there will be strict limits on how much money people can take out.
And now the IMF is warning that the three biggest banks in Slovenia are failing and that a billion euros will be needed to bail them out.
The dominoes are starting to tumble, and the United States won't be immune.  In fact, the greatest financial problems that the United States has ever seen are on the horizon.
But you can just have faith that U.S. Congress know exactly what they are doing and will be able to save us from the coming financial collapse if you want.
The mainstream media will provide you with all of the positive economic news that you could possibly want.  They are giddy about the fact that the Dow keeps hitting all-time highs and they would have us all believe that we are in the midst of a robust economic recovery.  You can listen to them if you want to.
But when you are tempted to believe that everything is going to be "okay" somehow, just go back and look at the numbers there were posted above one more time.
There is no way that the global financial pyramid scheme is going to be able to hold up for too much longer.  At some point it is going to totally collapse.  When that happens, will you be ready?
The New World Order Is Coming

Friday, June 12, 2015

Survival Shotgun

We hear a lot about the handguns and the rifles that are recommended for home defense and survival, but the shotgun is often overlooked.
The shotgun, may in fact be the best and most versatile survival weapon of all.
While, it’s not easy to conceal and its hard to deploy in tight spaces, so it’s not ideal to foil street crime or carjacking. However, for home defense and urban/suburban civil disorder situations the shotgun has great advantages over handguns and carbines. Just the sight of that big barrel and the sound of a round being jacked into the chamber can be enough to discourage most thugs.
One shot puts multiple projectiles downrange in a pattern that has a much better chance at a first shot hit than any other firearm. A direct hit at close range will positively stop the criminal D-E-A-D in his tracks. A few round sending dozens of projectiles downrange will stop a whole gang. Lower velocity “law enforcement” round are ideal for close quarters and indoors encounters since they have reduced recoil and less likelihood of injuring innocent people further away. In the street you are getting off about six rounds to the handgun’s one or two.
Shotguns have amazing versatility. You can perforate a vehicle with buckshot or stop it with a slug or armor-piercing round. You can use breaching rounds to open doors or use exploding or incendiary rounds to discourage attackers or clear your escape rout. Of course once you are safe you can still bring down game for food with shot and slugs. Compared to good handguns and combat rifles, shotguns are relatively cheap. You can get a good, new combat style pump, shotgun for around $300.00 to $400.00 dollars.
Shotguns are often less regulated than handguns and rifles and therefore, attract less attention. I do recommend that you replace the stock with a folding or collapsible stock for close situations. You may also want to ad a shell holder for quick reloads or to keep special rounds close by. Other customizing options include a magazine extension, barrel shroud, flashlight and laser pointer. Accessories are available for most Mossberg, Winchester, and Remington shotguns from Advanced Technology of Milwaukee Wisconsin and at most sporting goods stores.

Survival_Shotgun_Ammo
asd
A wide variety of ammunition is available for all occasions. Shown here are: law enforcement rounds (short), double-ought buckshot, slugs, armor -piercing, flamethrower, fireball, breaching, and non-lethal rubber rounds.
sdfs
Mossburg

Mossberg 500, 12-gauge “camper” model came with a pistol grip (no stock) this was easily replaced with an Advanced Technology folding stock and a 5-round shell holder.

Ithica

Ithaca “riot gun” designed for police use outdoors. It’s little less maneuverable indoors and not as convertible. Though you could saw off the stock and refinish the pistol grip.

Thursday, June 11, 2015

Under the Gun: 3 Reasons All Handgun Owners Need Training

Double Barrel PistolAfter spending a great deal of time behind the sales counter at my local gun shop, I reached a very interesting conclusion about folks who own firearms:
The gunpowder enthusiasts, the 3-gun runners, the old cowboy-action tricksters, the former active-duty soldiers, and even the knowledgeable hobbyists always seemed to keep firearm safety a priority… because they were always handling firearms.
On the other hand, those who kept their firearms in the safe, on the top shelf, or in the plastic foam-lined box for months at a time, often did not display safe weapon handling while browsing the glass cases… because they rarely handled firearms.
And of course, there’s the dude, who would show up at our Class III section for the express purpose of fondling firearms that he’d seen on ‘Call of Duty.’ That guy just made me nervous… but I’m not talking about him, because that issue should be obvious.

Know Handguns or No Handguns

The point is that the more people knew firearms, handled them, worked with them, and experienced their capabilities regularly, the higher their respect for safety. The others who simply wanted to own a firearm for novelty purposes, or rarely handled them out of fear, tended to be some of the worst safety offenders at the gun shop.
What’s the main difference between the two-types of firearm owners?
Simple: The one type of person is trained. The other type of person thinks they’re “good enough.”
But, “good enough” can get you (or someone else) killed when it comes to owning a tool as powerful and potentially deadly as a firearm.
So, here are three reasons why I believe that if you are going to own a handgun, then you need to take gun safety classes beforehand or within 24 hours of your purchase.

1. NRA Safety Training Courses Are EVERYWHERE

I know you’re thinking it, so let me just dispel all erroneous assumptions. No, I’m not advocating that the government require everyone to take a class in order to purchase a firearm.
We all know what the second Amendment is about, and I do believe that kind of law would give bureaucrats WAY too much power to infringe on the most basic liberties.
However, this training requirement should be a personal act of prudent self-governance, and the obvious choice of intelligent, responsible, and safety conscious firearm owners.
Especially for handgun owners, it’s an obvious and easily acquired necessity. How so?
If a firearm instructor or tactical training company tried to charge you more than $50 for a basic handgun course, then they’d better be throwing in the cost of the ammo.
Finding a course on the NRA website is easy, it’s almost always dirt-cheap, and these courses are everywhere. Honestly, saying that you just couldn’t find a course, or courses were too expensive, is a copout. If you can afford to purchase a handgun, then you can afford to pay to learn how to use it properly.

2. It’s the Basics That Will Keep You from Smiling for Your Mug Shot

Hollywood makes me crazy. It’s too bad we can’t sue them for perpetuating terrible safety habits. I can’t tell you how many times my spine tingles when I watch certain movies. For instance, have you ever seen Enemy of the State (1998)?
Here’s what I’m talking about: there’s a scene when you have Gene Hackman on top of Will Smith, holding him at gunpoint in an elevator. Sure, they make Hackman’s character out to be a military spook-type dude, but he sure didn’t act like it…
You see, he was swinging around a 1911 pistol like a madman with his finger on the trigger! Anyone who has ever held a 1911 knows that those are triggers are unforgiving. If Hackman’s character had been slightly startled by a distant sneeze, then THAT film would have been over in a hurry.
I do find it curious just how much the Hollywood-type seems to demonize guns, yet they’ll gladly play the trigger-happy hero. All the while, their depicted firearm safety handling is horrifying and laughable at the same time.
However, if a Marine ever points his muzzle down the firing line (otherwise known as “flagging”), you can bet that there shall be an immediate and thorough chewing out with lots of cussing, spitting and yelling.
Nevertheless, most handgun newbies are unfamiliar with the basics:
  • Muzzle discipline: consciously avoiding the act of pointing the business end of the handgun at something or someone you don’t intend to shoot.
  • Trigger discipline: consciously avoiding the act of placing your finger on the trigger (or inside the trigger guard) when you don’t intend to shoot.
  • To make a weapon ‘safe’: unload the weapon (drop the mag), always manipulate the slide or action three times, look and see that no rounds have been chambered, and feel inside the chamber to confirm that the weapon is, in fact, unloaded.
  • By the way, there is no ‘safe’… ALWAYS treat every firearm as if it is loaded.
And these are just the basics. I remember sitting there on the other side of the gun cases, as customer after customer “flagged” me and the rest of the store… with the slide forward (I’d never give it to them that way, but they’d go ahead and actuate the release lever) and their finger pressed firmly against the trigger.
Sure that might be “safe” in Hollywood or video game land, but this is real life, and those are real firearms.
So, c’mon, people. Just get trained. At least then you’ll know what is expected of a responsible and safe firearm owner… not to mention, you can avoid a manslaughter charge.

3. Firearms are Weapons. People Who Don’t Know Their Weapons… Die in Fights.

Admittedly, this particular pointer isn’t necessarily for the old cowboy – who just wants to display his antique-but-gorgeously glistening Schofield revolver on the wall in a case.
This one is for the kind of person who sees his or her firearm as a possible means of protection. It’s also why you should go at least a step beyond the basics and actually take an advanced handgun proficiency course.
Ladies and gentleman, if you get into a gunfight and you take the Hollywood approach, then I hope you purchased good life insurance. However, if you’re trained – you’ve been taught by folks who have studied or professionally operated in 2-way shooting ranges (AKA: gunfights) – At that point, you will have a much-needed advantage and a more realistic understanding about what could go down when you have to draw.
Here are just a few things you can learn from tactical training courses that are provided all over the US…
  • How to control firearm recoil
  • How to properly aim a handgun
  • How to draw and reholster safely
  • Where to place your rounds on the target
  • How to keep from firing a round in an unintended direction (i.e.: your foot, your dog, another person… anything that’s not the target)
  • Basic concealed carry protocol (how NOT to piss off the police, what NOT to do after a gunfight and when NOT to draw your firearm)
  • How gunfights are fluid, and to use lateral movement (advanced)
  • How to operate from cover and concealment (advanced)
  • How to fire from a ground position or if wounded (advanced)
And that barely even scratches the surface. Simply put, if you’re going to own a firearm for self-defensive purposes, before you spend oodles of cash on ammo, I’d spend it on training. Why?
Well, I’d rather engage an untrained lunatic with 23 available rounds than a trained professional with three – but that’s just me, I suppose.
A firearm is merely a tool, but the most powerful tools require common sense and intimate knowledge of how to use them.

Clearing your yard of fire hazard from Department of Natural Resources

You can call the Davis County Fire Warden and he will come and advise you of how to clear your yard (especially those who are on a ravine). Call:

Robert Sanders
(801) 939-9260 or (801) 618-9400 or rsanders@utah.gov

Wednesday, June 10, 2015

Over 1/3 of Population Not Working…JOBS DATA: 92,986,000 PEOPLE NOT IN THE WORKFORCE

The month of May saw 92,986,000 people not participating in the workforce, according to new data released Friday by the Bureau of Labor Statistics reveals.
May’s total represented slight decline compared to last month’s record, which saw 93,194,000 people outside the workforce.
The BLS defines those not in the labor force as people ages 16 and older who are neither employed nor “made specific efforts to find employment sometime during the 4-week period ending with the reference week.”
The labor force participation rate came in at 62.9 percent, a slight uptick compared to April’s 62.8 percent.
According to the BLS, the civilian labor force itself rose by 397,000, reaching 157,469,000 in May.
Of those participating in the workforce, 148,795,000 had a job and 8,674,000 were unemployed.
The overall unemployment data from the BLS saw payroll employment rise in June by 280,000 and the official jobless rate at 5.5 percent.

Sunday, June 7, 2015

How To Make Homemade Survival Cement

There are many uses for survival cement, especially when you are trying to survive in the wilderness or if you lose your house in an unexpected natural disaster. Homemade survival cement can be a great solution to these problems and more.
We all know how important shelter is when we are left to fend for ourselves out there. A tent isn’t always enough to protect us from the elements, and preparing food can prove impossible or difficult inside a flexible and flammable shelter. Homemade survival cement is much more durable and stands up well against the elements. You just need to know how to make it.
Make Your Own Homemade Survival Cement
As long as you can find dried glass and clay that is suitable, you can use homemade survival cement to build a temporary dwelling that is strong enough to keep you safe from the elements as well as animals that can harm you.
Homemade survival cement can also be used to build an oven inside your mud hut. You just need to put some effort into turning the mud and grass into cement. Then you can start building structures that will be livable if you ever have to make it on your own out in the wilderness.
Here is a peek at the original article. You can review the whole cement-making process here.
One of the most useful substances one can use outdoors is Survival Cement.
This mixture of mud and grasses can be used for a multitude of projects, from construction of shelters, cooking structures, kilns and food caches, to wrapping food for clay baking (as seen in my articles on these subjects in Wilderness Way magazine ) and much more.
Survival cement has been used throughout the eons of history in countless ways.
It is simple to make, the ingredients are easy to come by and it is one of the most durable resources available in a primitive situation. In fact, during a trip to Utah a couple of years ago we encountered some Anasazi ruins that were many hundreds, if not thousands of years old where the survival cement was still intact. (See photos below) How many modern buildings will be able to say that?!
Tips for Making Good Homemade Survival Cement
If you are using your survival cement as a mortar, create a mixture that is thinner and wetter so that it will fill each and every crevasse and joint.
Cut your grasses based on the length of the item for which you will be using your cement. If you are building a large structure such as a kiln, or cementing over a shelter foundation the grasses can be left much longer and placed so they run all in one direction as opposed to haphazardly throughout the mud. In this way they act almost like re-bar. (See an Anasazi example below.)
If you do not gather enough grass and have to go harvest more mid-making, cover and seal your existing survival cement as best you can while you are gone so it will retain the proper moisture content.
If you must add water to help rehydrate your mud, do so a LITTLE AT A TIME. It’s much easier to add more water than to try to re-create the proper consistency once the mud is soupy.
Step-by-step Instructions for Making Survival Cement:
Find a source of mud with as high a clay content as possible ‘If you smush some of the mud into a ball and it retains it’s shape, you should be good.) and fill up a bucket with it — more if you are planning a large project.
The great thing about homemade survival cement is that you can use it to build just about anything you can think of. Whether it is the walls for your dwelling, oven for cooking, or food cache, you can use all the resources that nature can provide in order to survive.
The amount of sugar in soda and its relationship with weight gain and obesity might be reason enough to stop sucking on that straw, but a new report suggests a more nefarious disease could be associated with soda consumption.
According to Consumer Reports, some sodas contain a compound that is a potential carcinogen.
Studies have shown long-term exposure to 4-methylimidazole, a chemical that is in caramel colorings to help turn sodas brown, can increase lung cancer risk in mice. Though there is currently no limit on the amount of 4-MEI in food, the U.S. Food and Drug Administration is assessing its cancer risk, according to California’s Office of Environmental Health Hazard Assessment.
A new report evaluating exposure to a possible carcinogen through soda consumption suggests it should be eliminated from beverages completely. But federal regulatory bodies say consumers shouldn't be concerned. (Photo credit: Shutterstock)
A new report evaluating exposure to a possible carcinogen through soda consumption suggests it should be eliminated from beverages completely. But federal regulatory bodies say consumers shouldn’t be concerned. (Photo credit: Shutterstock)
Consumer Reports and the Center for a Livable Future at the Johns Hopkins Bloomberg School of Public Health published a study in the Journal PLOS One this week that evaluated levels 4-MEI in certain sodas and assessed possible exposure to it as a carcinogen.
According to the study, Malta Goya had the highest concentration of 4-MEI and Coca-Cola had the lowest (clear sodas were not involved in the study because they don’t have caramel coloring). At the level of consumption that the study evaluated, exposure to 4-MEI from just soda could result in anywhere from 76 up to 5,000 cancer cases within the next 70 years.
“We don’t think any food additive, particularly one that’s only purpose is to color food brown, should elevate people’s cancer risk,” Dr. Urvashi Rangan, executive director of Consumer Reports’ Food Safety and Sustainability Center, said according to Consumer Reports. “Ideally, 4-MEI should not be added to food.”
The FDA has pointed out though that studies of rodents and exposure to 4-MEI involved levels of the chemical that exceeds estimates humans are exposed to through soda. It also noted that just because soda has caramel coloring listed in the ingredients does not mean that 4-MEI is a chemical used in that coloring.
Soda is not the only source of 4-MEI in diets either. According to the FDA, it can be formed during cooking, like when coffee beans are roasted.
On the state level, the study said that state regulatory standards seem to be effective at reducing exposure to the possible carcinogen, but Consumer Reports encouraged federal regulations as well.
At this point, the FDA states on its website that it is “not recommending that consumers change their diets because of concerns about 4-MEI.” The European Food Safety Authority, as pointed out by the FDA, also maintains that consumers should not be concerned about 4-MEI in their sodas contributing to cancer risk.
Watch Consumer Report’s video about its findings:

Friday, June 5, 2015

Food Storage Solutions: Buckets, Lids and Gamma Seals

Food storage can be a challenge. In fact, it’s one of the biggest obstacles new preppers encounter.
But don’t be discouraged. Your food storage woes can be solved once you become familiar with the tricks of the trade.
Our friends at Backdoor Survival have some tips for preppers who are having trouble overcoming their food storage challenges. Read on to learn more, and be sure to check out their site for information on food storage and other survival tips.

Food Storage Solutions: Buckets, Lids and Gamma Seals

Buckets are a fact of life when it comes to food storage. They are strong, light and moisture free, and, when sealed, will keep most, if not all pests at bay.  They are also readily available and the cost is nominal, if not free.
In keeping with the them of survival and food storage basics, in this article I share the ins and outs of food grade buckets, lids and gamma seals to safely store you bulk food items for the long term.

Food Grade Buckets Please

The term “food grade” is often mentioned when the subject of long-term food storage buckets is discussed. So what exactly does food grade mean?  Here is the scoop from the US Food and Drug Administration (FDA):
The FDA requires that plastics used in food packaging be of greater purity than plastics used for non-food packaging. This is commonly referred to as food grade plastic.  Food grade plastic does not contain dyes or recycled plastic deemed harmful to humans.
Food grade plastic does not contain dyes or recycled plastic deemed harmful to humans. In addition, a plastic container can no longer be considered food grade if it has been used to store non-food items like chemicals, paint, or detergent.
The Society of Plastics Industry has established a seven-point system of categorizing and labeling food grade plastics. Learning how to tell if a plastic container is food grade plastic is easy. Each type is identified with a triangular-shaped label with rounded corners made of three arrows and a number in the center.
The various types are:
1-PET (or PETE): PET or PETE (polyethylene terephthalate) is a clear, tough polymer with exceptional gas and moisture barrier properties. PET’s ability to contain carbon dioxide (carbonation) makes it ideal for use in soft drink bottles. Examples: Soft drink bottles, detergent bottles.
2-HDPE: HDPE (high-density polyethylene) is used in milk, juice, and water containers in order to take advantage of its excellent protective barrier properties. Its chemical resistance properties also make it well suited for items such as containers for household chemicals and detergents. Most five gallon food buckets are made from HDPE. Examples: Milk bottles, shopping bags.
Most but not all food grade buckets are type 2 HDPE. But, and this is a big BUT, unless your HDPE bucket is specifically labeled as “food safe”, assume it is not. You can still use it if it is lined with a Mylar bag prior to use.
3-Vinyl (PVC): Vinyl (polyvinyl chloride or PVC) provides excellent clarity, puncture resistance and cling. As a film, vinyl can breathe just the right amount, making it ideal for packaging fresh meats that require oxygen to ensure a bright red surface while maintaining an acceptable shelf life. Examples: Plastic food wrap, shrink wrap, garden hoses, shoe soles.
4-LDPE: LDPE (low-density polyethylene) offers clarity and flexibility. It is used to make bottles that require flexibility. To take advantage of its strength and toughness in film form, it is used to produce grocery bags and garbage bags, shrink and stretch film, and coating for milk cartons. Examples: Squeeze bottles, dry cleaning bags.
5-PP: PP (polypropylene) has high tensile strength, making it ideal for use in caps and lids that have to hold tightly on to threaded openings. Because of its high melting point, polypropylene can be hot-filled with products designed to cool in bottles, including ketchup and syrup. It is also used for products that need to be incubated, such as yogurt.
6-PS: PS (polystyrene), in its crystalline form, is a colorless plastic that can be clear and hard. It can also be foamed to provide exceptional insulation properties. Foamed or expanded polystyrene (EPS) is used for products such as meat trays, egg cartons and coffee cups. It is also used for packaging and protecting appliances, electronics and other sensitive products.
7-Other: This category basically means “everything else” and is composed of plastics that were invented after 1987. Plastics labeled as grade 7 should be specifically noted as being “food safe” before they are used to package or handle food.
These definitions of the various types of plastics are all fine and dandy but how do you tell – specifically – that a bucket or pail is truly food grade? That is an excellent question especially since there is a lot of misinformation on the Internet regarding what constitutes food grade plastic.
There are three methods you can use to identify food grade plastics:
1. Purchase new buckets that are marked “food grade” by the manufacturer. In addition to the actual text, you can look for the marks “NSF”, “FDA” or “USDA Approved”.
2. Find free or low cost used buckets that you know have already been used to store food and haven’t been used for anything else. You can find these at bakeries, restaurants, and food processing plants.
3. Call the manufacturer and ask.
Here are some other tips and things to look for when searching for buckets:
If transportability is important to you, make sure your bucket has a bail or a handle so that it can be easily lifted and carried.
As long as the bucket is food grade, don’t be afraid to use “free” buckets from the local bakery or fast food joint. Yes, the bucket may smell like pickles but with a good scrubbing with bleach, along with a day or two of airing outdoors, the smell will be all but gone.
Still smelly? Put some baking soda or charcoal in the bucket and seal it up for a few days. Take the seal off, rinse the bucket well and it should be sweet smelling once again.
Important: If a food grade bucket has been used to store non-food items like chemicals, paint, or detergent, it is no longer food grade.

Standard Lids Versus Gamma Seal Lids

Fortunately, most 5 and 6 gallon buckets utilize a universal 12” lid. This means that the various lids are interchangeable. The important thing to look for is a lid with a rubber gasket fitted to its inside rim. With the gasket in place, the lid, when securely attached to the bucket, forms a nice seal.
Often times you will find a source for low cost, used food grade buckets, but they may come with banged up or damaged lids. Fortunately, it is easy to purchase new lids, independent of the buckets themselves. Given the importance of a good seal, it is recommended that you purchase new lids regardless. The seal is what is going to prevent moisture and insects from entering your buckets.
Tip: Applying a light coat of petroleum jelly, Crisco or other lubricant on the lip can keep the rubber gasket supple and helps to avoid tears in the rubber. This will also contribute to a good seal.
Such lids come in two basic types, the standard lid and Gamma seal lid. The standard lid is okay in that it does the job, but, for some, it may be difficult to use. To attach it properly, you have to pound it down hard. Needless to say, this is hard on the hands and nails, so if you decide to go with the standard lid, you should also use a rubber mallet so that you can tap around the edges to secure a decent seal.
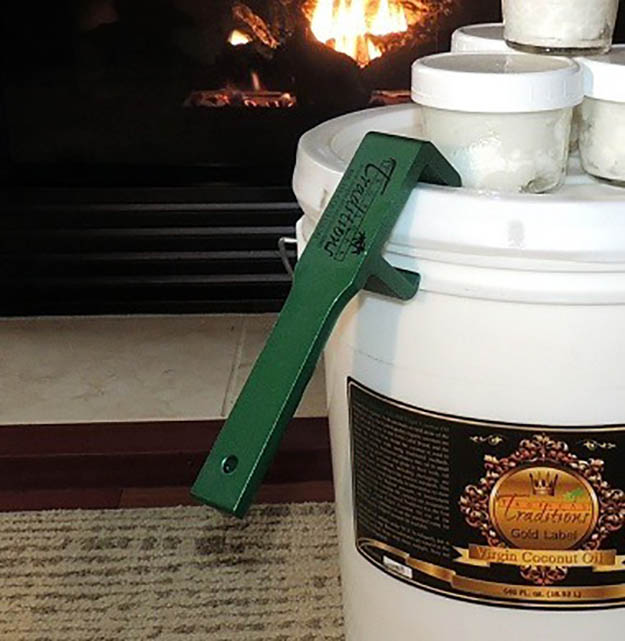
Getting the standard lid open, in order to remove it from the pail, is also a challenge. For very little money, you can purchase a special tool that will pry the lid open. The tool is called a bucket lid remover and should cost less than $5 online or at your local hardware store, typically in the paint department.  For a bit more money, you can get a metal lid opener, which is sturdier.
bucket lid remover, food storage, food storage solutions
A bucket lid remover is a must-have when using buckets for food storage

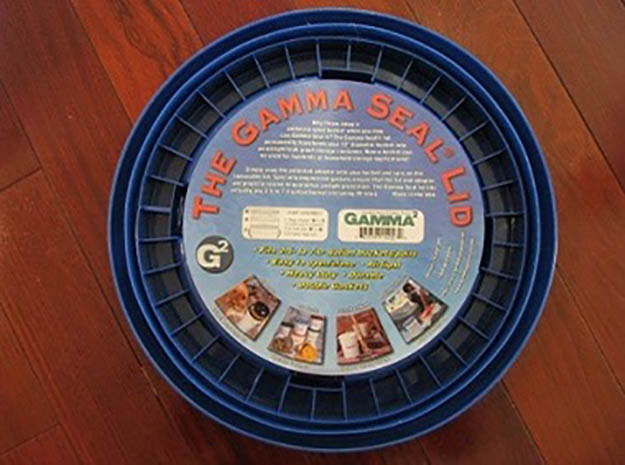
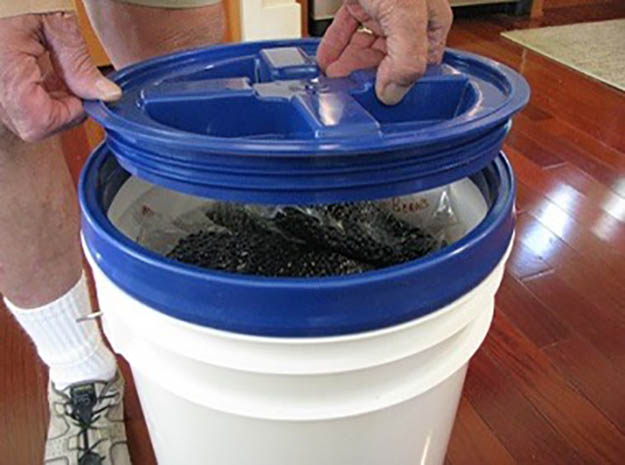
The other type of lid uses a Gamma seal arrangement. Think of the Gamma seal as a giant screw top for your bucket. All you need to do is snap the outer adapter ring on to the bucket then screw the inner lid into the outer ring. To make it easy, the Gamma lid has a big “X” molded in plastic making it easy to grab onto and spin.
gamma seals, bucket lids, food storage
Gamma seals are a great food storage solution

gamma seal, bucket lids, food storage
Gamma seals are easy to remove from food storage buckets

When you need to get something out of your Gamma-sealed bucket, all you need to do is unscrew the inner lid, pull out your product, then screw the lid back down.
gamma seal, bucket lid, food storage solutions
Unscrewing a gamma seal bucket lid

There are other advantages:
The Gamma Seal Lid has a stacking channel that is built into the outside rim. This allows you to safely stack several sealed buckets on top of each other, saving space.
They are airtight and leak proof.
They can be re-sealed over and over again.
The bugs cannot get in (although your product has to be bug and insect free to begin with).
The Gamma Seal Lids can be purchased in various colors if your storage system uses color-coding.
The disadvantages of a Gamma Seal Lid?  I can only think of one.  The initial investment can be costly. Still, when you consider that they are reusable and are interchangeable with various sized buckets, the price of aGamma seal lid is worth it. Plus, if you get the buckets themselves for free, the combined cost of a bucket and lid will still be a great deal.

What About Mylar Bags and Buckets?

When using buckets and lids (either type), an inner bag is recommended but is not mandatory, especially if you are using the bucket for short-term storage to keep out moisture and insects. An example would be the short-term storage of dog food.
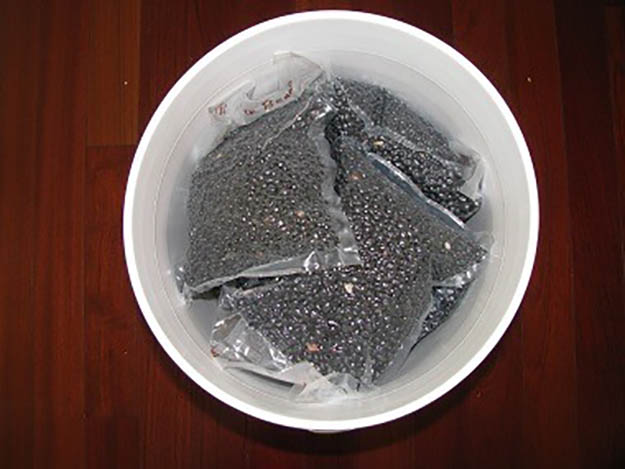
In practical use, I prefer a double seal system when I package my goods.  Sometimes I will use a FoodSaver bag and other times I will use a one gallon Mylar bag.  Either way, I will also use a 300 cc oxygen absorber. I then put the bags in the bucket, seal the bucket with a gamma lid, and I am set.  When it comes time to use some of the products, I take off the gamma seal lid, remove a single bag of food, screw on the gamma lid and I am good until the next time.
Something else I recommend, mostly for practical purposes, is to mix up the products in each bucket,  So, for example, fill a single bucket with a 1 gallon bag each of various beans, another 1 gallon bag with rice, and another with oats.  Throw some spices and bouillon in the bucket and you have a grab and go bucket with variety of food stuffs.  This is ideal if you need to get out in a hurry or if you want to share some of your product with a loved one.
food storage, emergency food, survival food, food storage solutions
Remember to mix it up when using buckets for food storage

food storage, food labels, food storage solutions
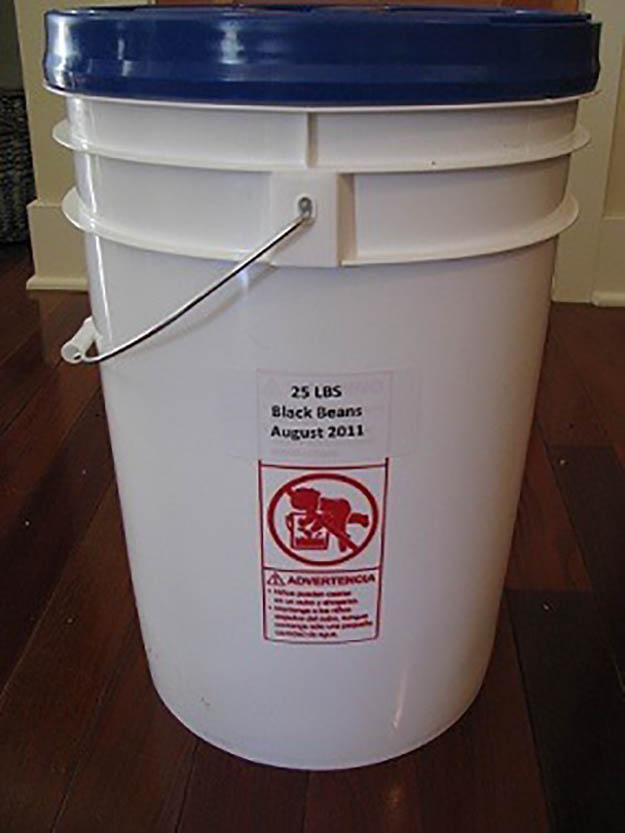
Always label your food storage buckets so you know what’s inside

Whatever you do, don’t forget to get out your Sharpie or other marker so that you can label label the bucket with its contents and the date it was packed.  Now that I think about it, a bucket filled in this matter would make a great gift for a non-prepper friend or relative.

Additional Resources

Now that you have learned about buckets, lids, and gamma seals, you might also be interested in the following articles on food storage basics.

The Final Word

What happens next?  I suggest that you head out to Wal-Mart, Costco, the LDS Home Storage Center or your favorite bulk food supplier and start purchasing 25 or 50 pound bags of of dried beans, rice, pasta, oats, sugar, salt, coffee, spices and other foods that you know your family will eat.
As always, do your best to purchase a little bit extra with each shopping trip or with each paycheck.   It may not seem like much but trust me, your emergency food supply will grow quickly and you will begin to feel confident that you will have plenty of food to eat during hard times or following a major disruptive event.
Note:  This article has been re-written and updated from the original version that was published in September 2011.